Perhaps the most drastic way to change your guitar’s tone is by installing a new set of pickups. And whether you’re making a big change in the type of pickup — like going from a single-coil pickup to a humbucker, or installing active pickups where you had passive pickups — or just installing a different pickup from the same family, you’re almost sure to create a notable difference in your tone.
Ordinarily, this process involves soldering, a technique which, if you’re like me and lack any experience in, can be daunting. And that’s where pre-wired pickguards come in. Already loaded with pickups, a switching system, volume and tone pots and all the necessary wiring, pre-wired pickguards simplify the entire process. Yet, there are still a few recommendations and steps you’ll want to follow during installation, particularly if you’re like me and this was the first time you’ve replaced a loaded pickguard. I’ll walk you through the steps I took in swapping out the pickguard of my Strat. Check out the steps below and use them as a reference if you decide to mod your own axe!
The Project
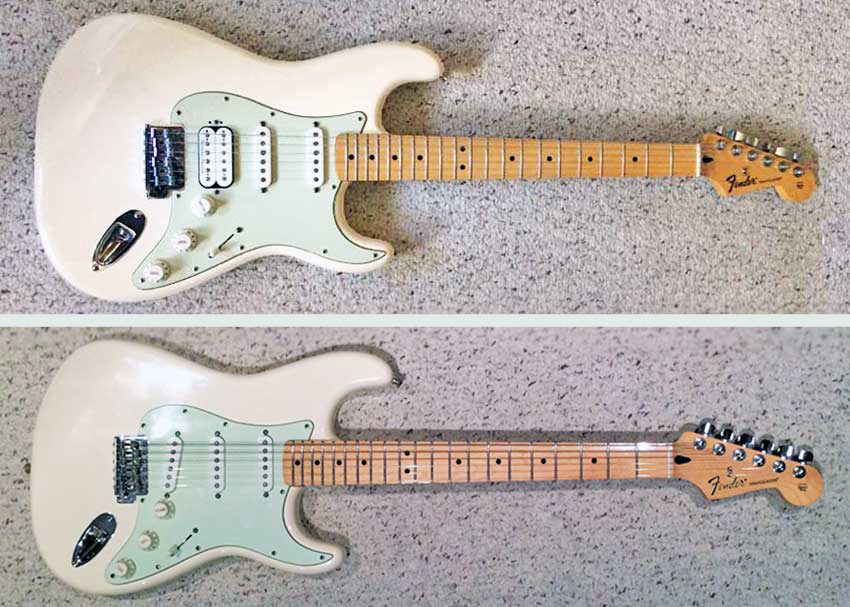
The guitar I chose to work on is my Fender Deluxe Lone Star Stratocaster. It’s no longer in production but is basically a spiritual predecessor of the current Deluxe Stratocaster HSS. Though I originally bought the guitar because of its versatile HSS pickup array, and I loved the high-output crunch of the Seymour Duncan Pearly Gates Plus humbucker, but, like many guitarists, I found myself wanting what I didn’t have — the distinctive bright snap of a single coil in the bridge.
BEFORE: My Strat with its original pickups
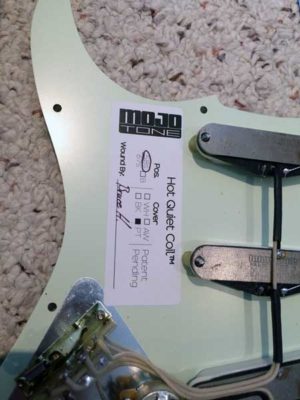
Enter the Mojotone 58 Quiet Coil pickup set. Not only did this pre-wired pickguard have a single-coil bridge pickup, it also boasted noiseless operation, free of the 60-cycle hum that plagues so many single-coil lovers. Also, it features high-quality potentiometers, capacitor and 5-way switch, for smoother taper and less treble roll-off when turning the volume down.
So did the new pickguard fulfill its promises? and how did installation go? Find out below!
Tools needed
- Phillips head screwdriver
- Cup or something to hold screws
- String winder (optional, but saves time)
- Scissors or something to trim wire
Step 1 – Remove or loosen strings
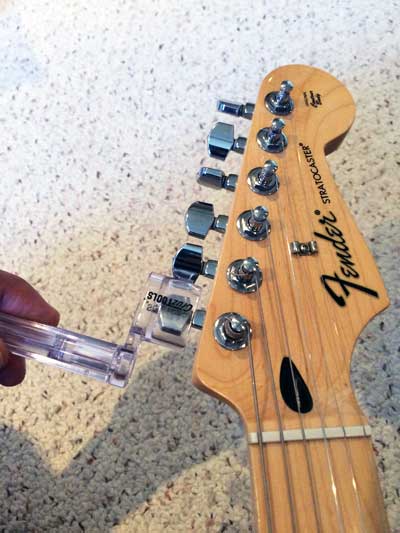
Remove strings, or loosen them.
If you’re gonna swap your pickguard, it’s probably best to do it right before a string change, as having the strings off the guitar makes this a much easier process. That being said, at the time of the swap, I had just recently installed a set of Ernie Ball Paradigm strings and I didn’t want to take them off. The swap was still doable, just more difficult. So learn from my mistakes.
Also, a side note — the Paradigm strings stayed intact during the whole process. I guess they are pretty tough after all…
If you choose to keep your strings on, just be sure to loosen them to the point where they have so much slack, they make an unintelligible flub when you play them.
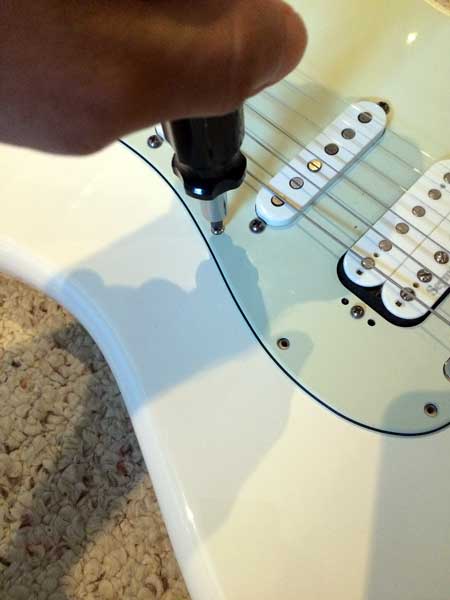
Step 2 – Remove old pickguard
Next, you’ll take a screwdriver to your Strat’s pickguard, removing the outside screws that hold it in place. NOTE: Do not try to unscrew the screws on either side of the pickups — those are there to adjust the pickup height, and you don’t need to remove them to replace the pickguard. As you go, be sure to put screws in a cup, baggie or some container to keep from losing them — my pickguard set did not include any extra screws.
Once the screws are out, grab your pickguard and lay it off to the side. It will still be attached to the output jack, and we’ll get to that next. Also, if you’re like me and left the strings on, I found it helpful to grab the five-way switch to lift the guard up a bit, then shimmying the guard over to the right, loosening the strings more as I went. (trust me, you never set them loose enough the first time) Occasionally, the pickup magnets catch a string; just pull them off and keep shimmying until you get it.
-
- Unscrew your pickguard’s screws
-
- Pull out your pickguard

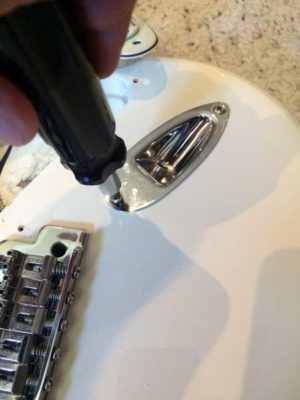
Step 3 – Disconnect output jack
Fun fact: what many players call their guitar’s input jack is actually an output. Think about it! Anyway, at this point, your lead wires are probably still attached and running through a small hole to your guitar’s output jack. First, remove the two screws holding your jack in place and store them in a cup. Then, either with your fingers, (or a wrench if it’s on really tight) unscrew the nut and keep it along with the washer and jack plate. Most likely, you’ll need to reuse those.
-
- Unscrew your jack plate
-
- Remove the washer and plate, leaving just your output jack and leads
Next, you’ll need to disconnect both the lead and ground wires from your output jack. Use a wire cutter, then store the jack away and pull the ground and lead wires out through the cavity in the guitar’s body (where the pickups go). Note where your original guitar was grounded. Mine had grounding points soldered on the pots, as well as one spot under the bridge pickup and one that ran through another cavity in the body and through the back on the tremolo claw.
Cut any grounding wire that you do not need and keep any that you do. NOTE: Your needs may vary, but most Strat-type guitars will need that grounding on the tremolo claw. I made the mistake of snipping both. I did not need the wire under the bridge pickup, but I did end up having to replace the ground on the tremolo claw.
-
- Grounding point 1 – under the bridge pickup
-
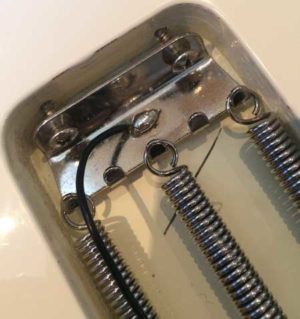
- Grounding point 2 – under the tremolo claw
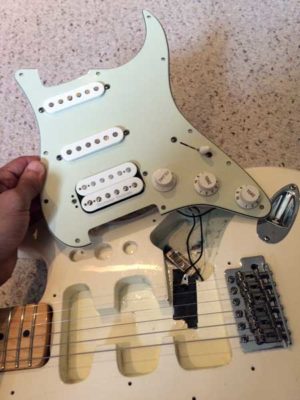
Step 4 – Examine the new pickguard
Take a look at the new pickguard you’re planning on installing. Are all the cables and parts you need there? If not, double check the packaging and go back to earlier steps if necessary. Double-check that its screw holes match up with your guitar’s. (this isn’t always the case) Hopefully you compared them before shopping, but if the holes don’t line up, you’ll have to drill new holes in the pickguard and body.
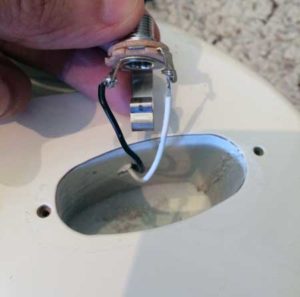
Step 5 – Insert new jack, lead and ground wire
Your pickguard should include a replacement jack, along with threaded or wrapped lead and ground wires. Grab the jack and place your original washer, nut and jack plate over it, screwing it in to tighten. With those in place, run the wires through the cavity into the area where you pickups will go. Screw in the jack plate.
-
- The underside of the new pickguard
-
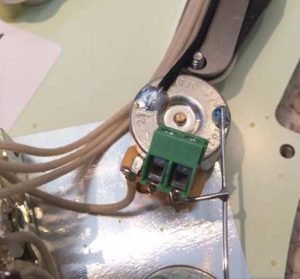
- These two green slots are the grounding terminals
-

- Inserting the lead wire into the top terminal
-

- Hold wire in place and use a small screw to tighten clamp down on wire
Step 6 – Connect lead and ground wires to their terminals
If you’re like me and your new pickguard features solder-free terminals, you’re in luck. If not, you’re gonna have to do some soldering and that’s another post for another day. The terminals are two slots you see mounted to the pickguard, one is for the lead and the other is for ground wires. In my case they were green. (see pictures above)
First, take your lead wire (most likely colored white) and expose a bit of the wire under the wrap. If you have a braided covering on your wire like I did, this is as simple as pulling the covering back to leave just enough exposed wire to connect to the terminal. If your wire is coated in plastic or rubber, take a pair of scissors or a knife and carefully score all around the wire just a few centimeters below the tip of the wire, so that you’ve made an indent cut but haven’t cut through the wire. From there bend the wire back and forth until you start to see the seal breaking and the exposed wire underneath. I usually get my fingernail underneath this slit then pull up so the rubber comes off and the exposed wire remains.
Connect the white lead to the top terminal. This is the terminal that would lie on top of the other one with the pickguard sitting in the guitar like normal. Slowly insert the exposed wire into the terminal and then use a small Phillips head screwdriver or flathead screwdriver to tighten the clamp on the terminal.
Next, take your output jack’s ground (black) wire, along with the ground wire attached to your tremolo claw. Get enough wire exposed on both to tie them together in a sort of braid, then insert the braided exposed bits of wire into the bottom terminal. Again, tighten the screw until the wire is securely in place.
Step 7 – Put your new pickguard in place
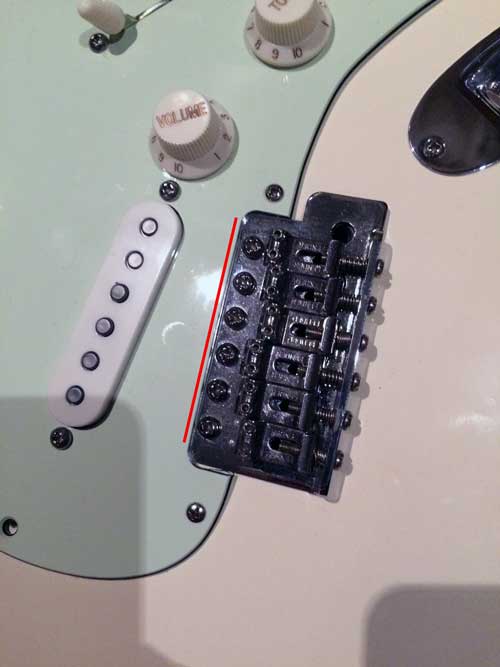
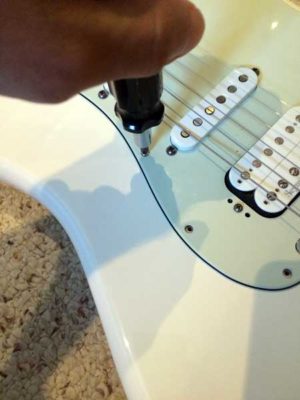
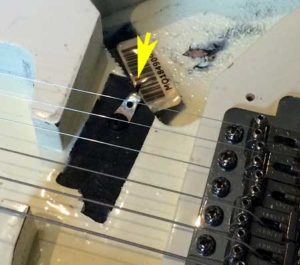
My pickguard was a little long. Ideally it should end where the red line is
With all your wires connected, you’re ready to pop in your new pickguard! Position the guard to line up with your screw holes, then make sure your wires are neatly tucked under the guard and begin screwing in the screws you hopefully saved nearby.
When checking the screw holes, you may notice that your new pickguard doesn’t exactly fit perfectly. It may be a bit long on the bridge or neck pocket side. If it’s not fitting right, check both of these spots to determine which is at fault. In my case, the bridge end was a little long and not quite wide enough to fit around the bridge. Take a file of some sort or sandpaper and file the troublesome end down. It may be helpful to draw a line at the point you wish it to be at after sanding to make sure you don’t overdo it. Once you’re good with that, screw in the screws and boom, your new pickguard is in!
Step 8 – The final touches
With the new guard in place, it’s time to test it out. Re-string your guitar — or don’t, if you’re like me — then plug in a cable to the output jack — loosen or tighten the nut if necessary, and fire up your amp! Check to make sure you’re getting sound from each pickup, that your volume and tone pots are working and, most importantly that you’re not getting any hissing or noise.
If your pickups are traditional single coils, then some 60-cycle hum is to be expected. You’ll know if this is what you’re hearing because it should be almost completely off when you switch to positions two and four (neck/middle and middle/bridge). If you’re still experiencing noise and it’s higher pitched than 60-cycle hum, try touching your switch, your cable or your amp. If it gets quieter when you do, your guitar may be improperly grounded or not adequately shielded. For more information on shielding a guitar, see the video below:
My Results
It’s been a few weeks since I installed the 58 Quiet Coils in my Strat and I’m digging them! The neck and middle pickups are definitely more mellow than the stock Texas Special pickups that were in there. That’s not at all a bad thing though — these pickups still sound rich and full, just with a more vintage character. The bridge pickup is just what I had hoped for, nice and twangy and it sounds great with fuzz. Although I once again find myself missing that humbucker bridge tone…sigh…
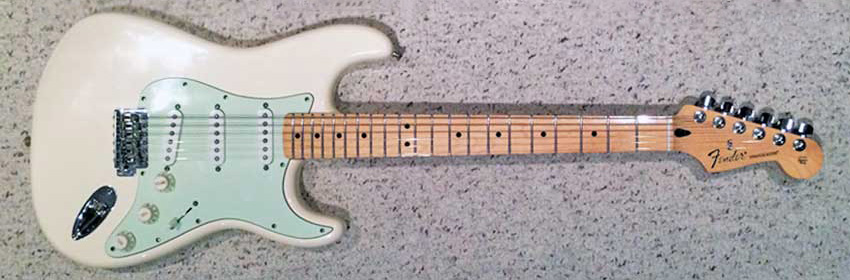
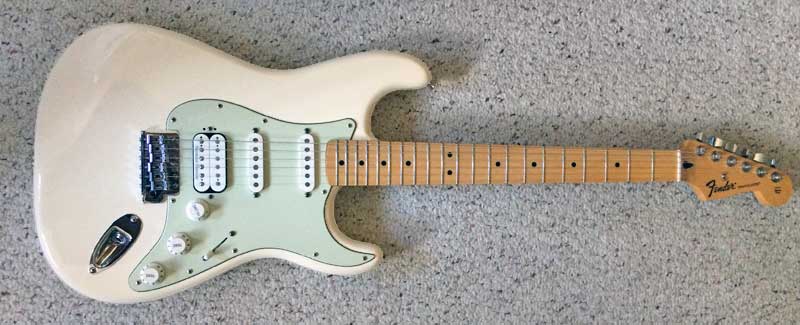
My Strat with the new pickguard
The pickups are as advertised: silent. It’s actually a little weird and may take some getting used to for players used to hum. One of the biggest upgrades I noticed though was in the pots — the taper was extremely nuanced. Each little bit of volume I turn down has a noticeable impact, where with my old setup, I didn’t notice a volume drop until I got to about 1/3 of volume. Also, turning the volume down does not lead to a loss of treble with the Mojotone guard — your tone stays intact!
I did have a few issues on first install, which is why you may have noticed that in the picture showing the bridge line, my guitar has no strings. After first installing them, I was getting hiss, so I had to re-install it and tie up the ground wires together, which I neglected to do the first time. But now, everything’s hunky dory and sounding great!

