Programming drums in a DAW MIDI channel is a convenient and easy way to plot out the skeleton of a composition you intend to record without busting out the big, loud drums. With the amount of drum plug-ins and modules available today, you can have pretty realistic-sounding drums on your track in a matter of minutes. Unfortunately, those drums often sound lifeless, robotic and frankly, trash. This isn’t your plug-in’s fault, nor is it because of how you’re mapping notes. The problem is that drum notes programmed on a quantized grid usually are lifeless, robotic and trash! They don’t sound real, have several “thin” characteristics, and sound inhuman. The way to make your MIDI notes sound more like an actual drummer played them is through a process called “humanization.”

Why Humanize a Drum Track?
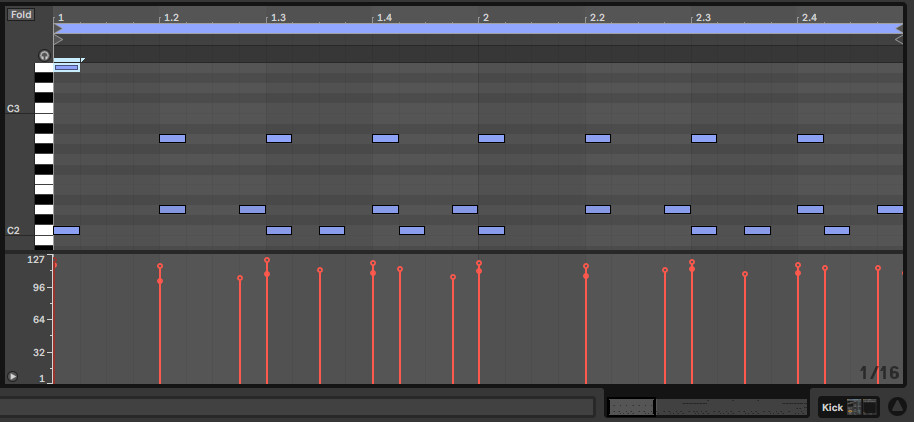
Humanization is a process that involves adjusting a few different parameters within your DAW. Velocity, timing, pitch, and note duration are all things a normal drummer adjusts while playing without even thinking about it. It’s physically impossible for a human drummer to sit behind the kit and play the exact same note, at the exact same time, with the same pitch, etc. So why are we letting our drum MIDI go full “uncanny valley” when we program drums?
The subtle swing human drummers throw on a beat is part of the overall groove. This is why you can listen to Dave Elitch lock into a groove even when he’s playing behind the beat, or out-front, or both! The head-bobbing, goosebump-inducing groove is only achievable with humanization because your ears are so good at picking out perfectly quantized notes as sounding robotic and unnatural. The imperfect note, velocity and pitch is in fact perfect for great-sounding music, and if that doesn’t say something about life, I don’t know what does.
How to Humanize Robotic Drums
Humanization is similar in many DAWs. There are actually plug-ins that specialize in humanization, but let’s go over how to do it yourself, so you can apply to any DAW or workflow.
You always want to begin with velocity, but keep in mind that your sample must be velocity adjustable in order for this to work. Typically, drum samples from major third-party plug-ins, DAW samples, or kits will always have adjustable velocity. Single-shot samples may not, however, so if adjusting velocity isn’t doing anything, keep this in mind.
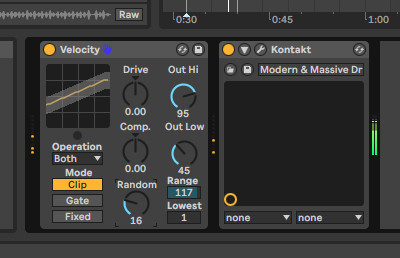
A quick and easy way to adjust velocity in a DAW like Ableton Live is to go through the MIDI EFFECTS folder and select VELOCITY for the MIDI channel or clip you’d like to affect. If your DAW doesn’t have a velocity effect, you can typically adjust individual note velocities within the mapped note timeline where you originally plotted out your drum beat or dragged in your sample groove.

Using the Velocity effect, adjust the RANDOM effect knob. You can dime this out to 100% to hear exactly what it’s doing, but something around 10-20% is generally more subtle and human-like. I also like to play around with the range knob. Typically, MIDI notes have a velocity that’s measured on a scale from 0 to 127. On this scale, 0 is silence, while 127 is like the hardest, Dave Grohl drumming for Queens of the Stone age at Glastonbury Festival in 2002-type hit. And if you’ve ever tinkered with a drum module and set all velocities to 127 you know that a full-on 127 hit chokes out a ton of tone and makes your drumming sound incredibly unnatural. So sometimes I tend to exclude the RANDOM function from selecting hits at 127 velocity. Also, I know I don’t hit that hard when I play drums live, so if I am the drummer on the project and am programming drums to sound and feel like me, I set the velocities to something more “me-like.”
Up next is timing your MIDI notes. We all know that even the most practiced drummers and percussionists play slightly out of time. It’s unclear if, in all of human existence, a human drummer has ever hit a note perfectly in time — it’s just not possible. So how would your programmed drums sound “real” if they did?
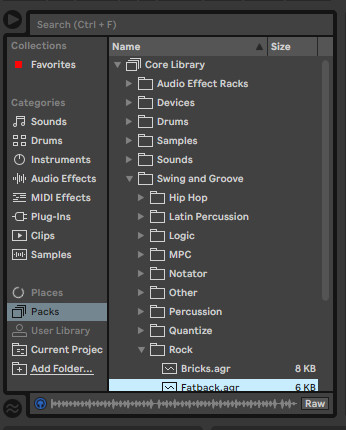
A way we used to do this that still works very well is getting your MIDI pattern up on the grid and moving the notes ever so slightly out of quantization. Some hits go before the beat, some after, but none should be so far out that you can start to tell they’re out of time. In Ableton Live, this is called “Grooves.” The software does it for you automatically and then can be tweaked for further customization. Other DAWs have a similar feature, such as Logic Pro X’s function labeled Humanize.

Within Ableton Live Packs, you can select your Groove from the list. Each will have a generic MIDI note audio clip that you can monitor before selecting to make sure it will fit the composition. After dragging the Groove to your sampled MIDI clip, you can start to play with timing and randomization within the pop-up effect modification tab. Setting the TIMING to 0% is similar to setting an effect to 0% wet/dry: it will do nothing. I typically let the clip play with a few different values to find my ideal timing. Randomization is similar but adds an even more crucial human element into the groove, which is letting each note have a small variance in timing, just like a real drummer.
Life Beyond Humanization
Now that the clips are humanized, you can really hear the difference and how they sit in the mix a lot more naturally than before. Additional enhancements can be made, such as pitch of specific drums, cymbals, etc. But most of the time if I’m using a third-party drum sampler VST, realistic pitch shifting is built into the velocity and samples of each drum or cymbal. But it’s your composition, and sometimes adding in something that isn’t necessarily “needed” can lead to happy accidents or a tone that you know you’ll want to use later!
Recording at home with MIDI-mapped drums is getting easier and easier with great drum VSTs and samples. But to really bring your compositions to the next level and make the best of the situation, you need MIDI humanization.


Leave a Reply