Ambisonics is a phrase used to describe a way of listening to sound beyond the mono and stereo world we’re normally exposed to through headphones and speakers. Ambisonics is immersive audio coming to you from all angles — left, right, north, and south.
If you’ve caught any of the previous Beat Connection posts, you’re probably noticing a pattern. We’ve slowly moved out of the world of explaining what something is and entered the realm of trying to understand new concepts, techniques, and examples of things that we might not yet have a full frame of reference for.
As we connect to the “beat” of music, we’re trying to go out on a limb and explore our connection to things that might take us out of a rut — binaural recording, generative music, understanding DJ technique — and force us to examine music not just as a collection of loops, melodies, and harmonies but of sound existing in actual space we can control.
Allow an easement (an easement is the abandonment of a stricture).
Brian Eno and Peter Schmidt, from Oblique Strategies
In a world where virtual technology is increasingly moving into three-dimensional spaces, audio itself is being created using ambisonic techniques to place sound in multiple directions: up, down, back and front.
NOTE: From here onwards you’ll need to wear headphones.
Using headphones, one can recreate sonic space as it “truly” exists in our day-to-day world. Using Ambisonic tools, sound itself escapes a linear plane. Our goal today is to both give you a better understanding of what Ambisonic audio is and what tools exist out there for you to create with it.
Music Of The Sphere
Three-dimensional, 360-degree audio has been with us for longer than we imagine. Since the ’70s, conceptual ideas, recording gear, and playback devices have allowed us to create an immersive sound environment. Ambisonic audio simply became the concept we used to tie these ideas together.
Typically, using a 4-direction ambisonic microphone capturing four streams of audio pointed at a W-X-Y-Z axis, the microphone is situated in a “sweet spot” recreating what our own ears would encounter. Using just 4-channels of audio, one could recreate a sphere of sound this way.
Ambient Sound Is Not Surround Sound
It’s important to know the difference between ambisonics and surround sound. Surround sound sends audio in specific channels to speakers aligned in a pre-determined way, to recreate immersive sound. Ambisonics is not speaker-dependent. Ambisonic audio sends an uninterrupted stream of sound across a pair of headphones.
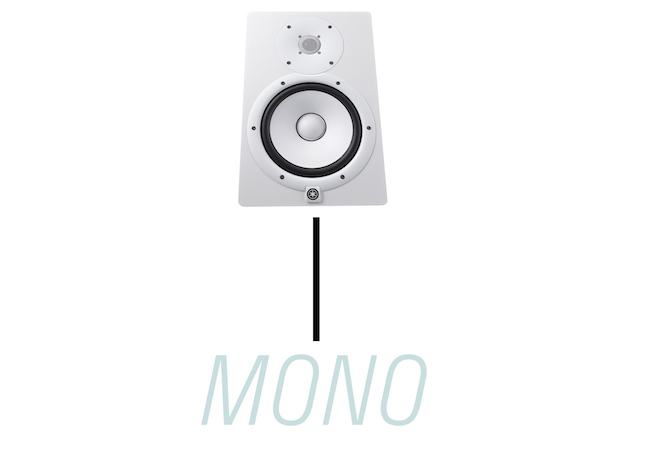
In traditional surround sound setups, speakers are laid out in front of you on all axes. If a sound needs to move (let’s say a singing bird flies from the ground to the sky) it does so by moving along the line of speakers in a planned-out path.
Under perfect conditions, let’s say a movie theater, this immersive 360-sound experience works within specific parameters. However, a surround sound system isn’t a perfect vessel.
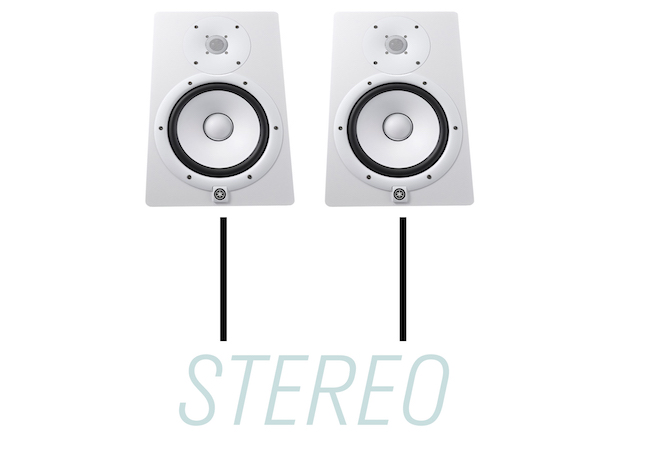
If you’ve found yourself stuck at the end of the theater or near the front, you were bound to have heard certain sounds from a movie appear more pronounced or louder than viewers situated elsewhere. Sound, regardless of latency, takes a while to travel among speakers, just like it takes a while to travel to you the listener.
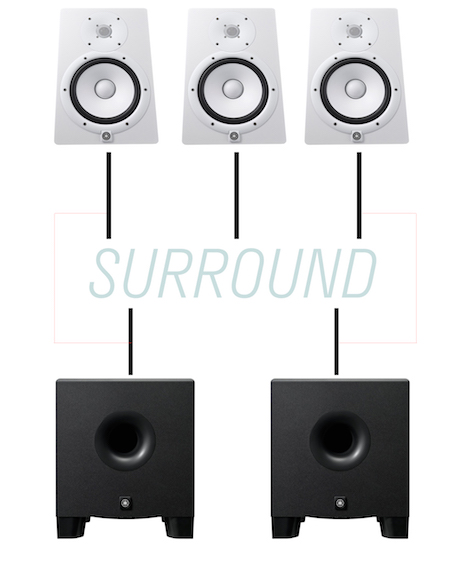
The more movement on screen, the more noticeable the gaps between speakers become — snapping you out of that immersive experience. No matter where you sit, speakers will only present a horizontal plane of sound. Ambisonic audio adds a longitudinal plane.
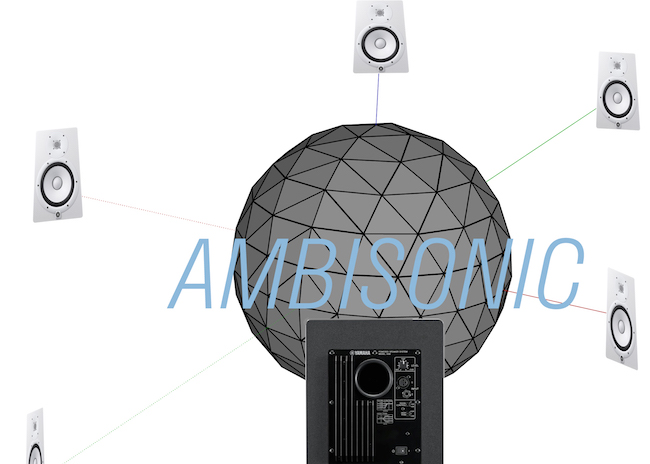
Ambisonic audio doesn’t require multi-channel speakers or multi-channel audio. Using headphones deletes the gap between speakers. And since headphones move with you, speaker volume variances are negated. You’re always situated in the middle of the action, so to speak, with Ambisonic audio.
Ambisonic Tools For Static Sounds
Although we’d love for you to run off and trade in your locker of directional microphones for Ambisonic versions like Zoom’s H3-VR or Rode’s NT-SF1, truth be told, you can give existing recordings — specifically, stems — the Ambisonic treatment. Virtual plug-ins exist that let your DAW manipulate sound in a 360-degree environment. Using stereo and mono sources, you can create Ambisonic audio.
We’ll try to keep this part simple. Ambisonic software works by using a specially designed algorithm to split your mono or stereo signal into multiple audio streams that will cover the spatial locations of audio within a sphere — left, right, up and down. Ambisonic encoders are the plugins in charge of doing this.
If you’ve encountered Ambisonic encoders, you will need to pair them with Ambisonic decoders that take those same multi-channel signals and scale them to be heard on your chosen playback device — headphones, multi-array speakers, etc. In decoding software plugins you’ll find something referred to as “First Order Ambisonics.” This phrase simply confirms that signals now exist that can be manipulated with individual lateral and elevation information.
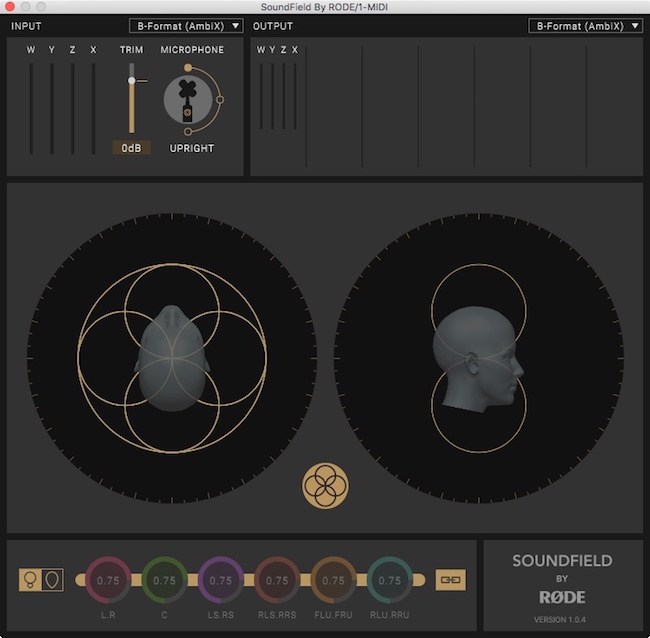
So, where do you go from there? You need software that provides both encoding and decoding. During the decoding phase, you can set up your listening environment as binaural, opening the world of Ambisonic mixing to your headphones.
If you have the opportunity or want to put the investment in, you can buy specially made Ambisonic headphones (with a built-in head tracker) that work in tandem with software decoders to fully put you in the immersive sound environment for mixing purposes. The Waves Nx line fuses embedded headphones with Nx Virtual Mix Room software to achieve such a mixing environment.

For those who want to dip their toes in that field, let’s take a look at what you can do with Ableton.
Creating Immersive Audio with Ableton Live
Recently, as of this writing, a consortium of multi-disciplinary musicians, artists, and scientists worked together to develop a set of Max For Live plug-ins that introduce Ambisonic audio into the realm of Ableton Live.
Completely, free and open-source, Envelop Tools for Live is a suite of spatial 3D sound plug-ins that allow Ableton Live 10’s stereo-centric DAW environment to function, work with, and export multi-channel Ambisonic audio. From here on, I will refer to devices found in the free download of Envelop Tools which you should grab if you want to continue onward in this section.
Ambisonic Setup – Envelop Tools
Here’s how to create an Ambisonic track using Ableton Live. First, on each track that you’ll use, you’re going to need to place the E4L Source Panner device found in the Envelop Tools suite right at the end of any effects chain (if you have one) or following immediately after your virtual instrument, if you don’t.
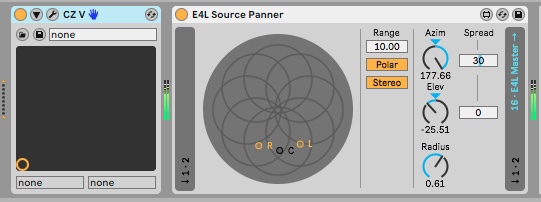
Immediately, you’ll notice you aren’t hearing any sound coming out of that channel. The Ambisonic panner needs an Ambisonic decoder to monitor the multi-channel audio coming out of that device. To do so, you just right-click any open space in session or arrangement view and select Insert Return Track. On the newly created insert, we must then place the E4L Master Bus device found in the suite.
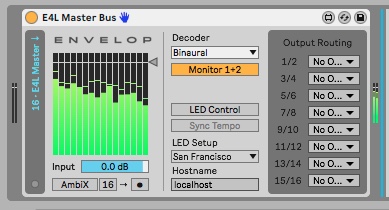
Here, notice how this change immediately lets you hear audio playing through — adjust your settings to match mine, if you can’t. What’s happening is the decoder is taking all those multi-channel audio streams and piping them through your stereo headphones using internal logic that’s filtering out certain channels, just enough to treat you to binaural audio you can actually listen to.
Not entirely an Ambisonic sound just yet, it gives you just enough spatial feel to approximate how the audio will move/sound through an immersive space.
Now, if you have the scratch to afford it, (and a multi-channel audio device with enough outputs like a Universal Audio Apollo X8P interface) you can use that “Output Routing” section to send those same audio channels out to up to 16 speakers. For us, lets stick with headphones.
Moving Through the Ambisonic Sphere
Now, when you go back to the original audio channel, you can use the “C” dot to drag the audio source with your mouse in a spherical sound environment. As you move it inward within the concentric rings, you’re moving forward and closer to the sound source. Choosing the type of sound source you’re working with — Stereo or Mono — and the Range (or total units of length) lets you fine tune how much of the panning effect is heard. Polar and Cartesian plot points let you specify how you prefer to picture the sonic sphere.
Move it back and you’ll appreciate sonic distance. Move it left or right and you’ve got a really sophisticated panning effect. “L” and “R,” the left and right channels, depict how far away the stereo speakers are from your center. Spread is a set of controls laying out the spacing between left and right on the X and Y axis.
The Azimuth controls what direction in a horizontal plane you’re facing. The Radius manually controls how distant you are from the center of the sound source.
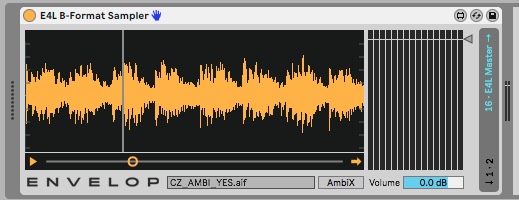
To put these ideas in action, download this AmbiX AIFF file I created of the original binaural track example. Using Envelop Tools’ E4L B-Format Sampler, place it on an empty MIDI channel. Then, add the E4L Source Panner after it. On that same channel, drag and drop that downloaded file and hit play within the Ableton device. What you’re hearing now is a pre-recorded ambisonic track in all its multi-channel glory, ready to be remixed using the rest of the Envelop Tools Ambisonic effects.
What makes the E4L Source Panner effect truly “ambisonic” is that you now have access to control over the elevation of sound. Experiment with this sound by placing the dot anywhere you like. Then, slowly adjust the Elev control. Notice how the spread of speakers changes. So, if you can imagine them in real life, as you add more elevation these same speakers start to appear closer, below you, and vice versa.
Ambisonic Effects For Mixes
Although one hates to generalize, Envelops Tools feature a trio of ambisonic effects that you’ll find some variation of in other ambisonic audio software. Three effects — delay, reverb, and spinner — are the trinity of spatial audio devices which use ambisonic principles to mess with time and space, in a way you won’t normally hear in other “stereo” effects.
Let’s begin with delay. Delay is an effects unit that spreads out your initial multi-channel Ambisonic audio to 8 different points on a 3D space. What makes it different from most multi-channel delay units is that here you have control over the root position of the sound source.
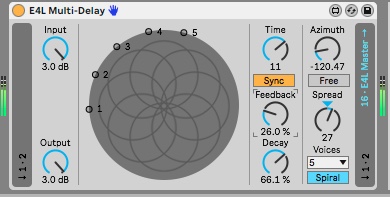
Coupled with an E4L Source Panner, the E4L Multi-Delay lets you create delays that can come at you from different directions (horizontally and vertically), moving through these spaces, rather than simply ping-ponging along left to right. Cascading rather than repeating — this is an interesting effect not entirely possible with common stereo delays.
Envelop’s reverb tool, E4L B-Format Convolution Reverb, applies spatial science to the reverb realm. Using IRs (or pre-recorded ambisonic impulse responses) you can truly approximate how that source would sound in that space and within its space along the spherical dimension.

So, now if you’d like a cavernous reverb to sound like its sound source is getting closer to the walls you can do so. That’s one of the many ideas you can conjure using such an effect.
Finally, we get to Envelop’s unique panning effect: E4L Spinner. Think of this effect as a Hammond Leslie on steroids. Obvious effects include rotating your sound from left to right.

Not-so-obvious effects include rotations that factor height into the mix, doing the seemingly impossible that existing tremolo, auto-pan, and vibrato units can’t. Controls include letting you set elevation ranges and controlling the range of movement.
Rendering Audio in Ambisonic Format – Ableton Live
We end this semi-brief toe-dip into the world of ambisonic audio by showing you how you can take Ableton Live audio and create ambisonic multi-channel AIFF files you can use elsewhere with software like Reaper, Nuendo, or ProTools HD, that can integrate spatialization authoring software from Facebook, Google, Samsung, and other companies that are pushing immersive audio into the VR video and video game realms.
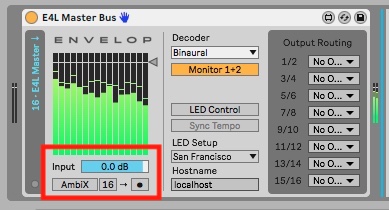
I’ll paraphrase some of the directions found in Envelop Tools’ own manual (note: here’s where it pays to RTFM).
First, make sure all channels that will be recorded are sending audio to the E4L Master Bus. You can verify this by seeing the words 16 * 4L Master → are lit in blue, signifying audio is being sent.
Then, make sure all audio is stopped. On the E4L Master Bus look at the section right below “Input.” There, you’ll notice a button that either says AmbiX or B-Format. Likewise, you’ll see two buttons, one stating 16 or 4. Then, a greyed out “•” record button.
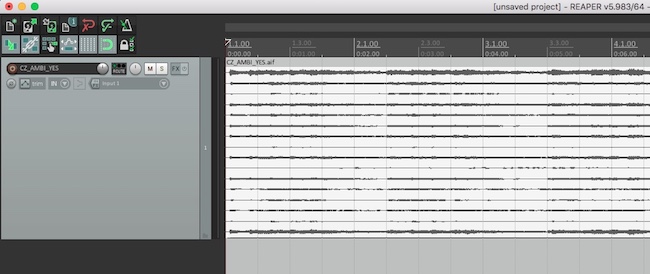
Most commonly used VR authoring interfaces will use the AmbiX ambisonic format. Much like WAV vs. AIFF, personal preference will dictate what you set in the first button. Sixteen and 4 dictate the number of audio streams that can and will be recorded on the final AIFF file. For most purposes, 16 is what you want to set this to. When you toggle the “•” character on you’re in essence arming the Ambisonic recorder.
Once you hit play, in either arrangement or session view, all audio playing through Ableton Live will be mixed down and saved onto a single multi-channel AIFF file once you hit “stop.” From there, it’s ready to be used elsewhere where its journey can continue into the unknown.
And now that same AIFF file has audio that can be reimagined, reheard, and remixed in a way that you (or possibly, we) will have ample time to discover. For now, this is a good beginning.
All images and audio examples by author.



Leave a Reply