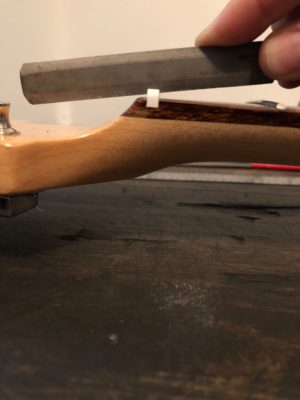
A mentor who I came to trust very much, once told me that when it comes to having a nut made, make sure to go with the luthier who is looking to charge you the most. This flies in the face of convention when coming from the perspective of a struggling artist, and a college student to boot. The bottom line of this statement is that while the nut on your guitar is one of the smallest parts of your instrument, it is still one of the most influential on the tone, intonation and overall playability. In addition, it is also one of the most tedious parts of the guitar to make, due to the many variables that govern its performance.
My experience in making nuts has proven to me the extreme curve in learning how to make an effective nut, and also the gray areas encountered in deciding when to stop cutting material, or to forge on. This doesn’t make for a very compelling do-it-yourself guide, but is a great opportunity to appreciate what goes into making a good nut. Knowing the factors that make a good nut, and being able to identify them, may inform you on how to determine when the nut on your favorite guitar is one of its strengths, or an opportunity to make it even better.
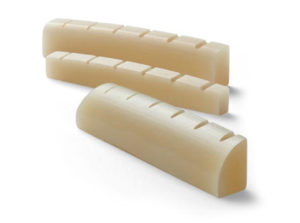
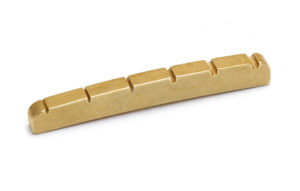
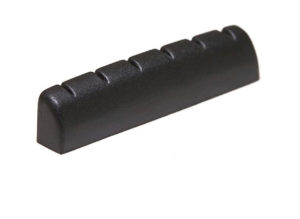
For those not already familiar with this devilish device, the nut is the small piece of material which bridges the strings from the low end of the fretboard to the tuning machines on the headstock. It is most often white or slightly off-white in color, and is most commonly made of bone or a synthetic plastic material. You will sometimes also see graphite nuts which are black, or even metallic nuts made of brass or steel.
- Bone nuts, which are common on many guitars.
- Brass nut. Thought to have unique durability and tonal characteristics.
- Graphite nut. Made for ideal string passage when tuning and doing whammy bar dive bombs.
1. String Spacing
One primary function of the nut is to ensure the correct spacing of the strings from each other, as well as the outermost string’s spacing from the edge of the fretboard. The first critical measurement in determining nut spacing is the distance of the outer most strings, that is strings one and six, from the edge of the fretboard. The danger in having strings too close to the edge of the fretboard is having the strings slip off the edge when you go to fret them. If they are too close to the middle it can compromise the overall spacing of all the other strings in the middle, making fretting chords and scales uncomfortable across the entire neck. Instead, a well experienced luthier has learned the balance of stretching the outermost edges of the string spacing to utilize as much of the fretboard width as possible without pushing them too far over the edge.
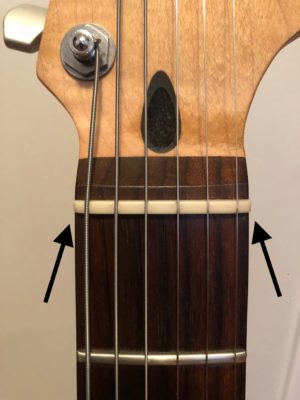
Strings one and six properly spaced from fretboard edge.
String is too close to the edge and slips when fretted.
A master luthier will likely be able to accomplish this string spacing by measuring by eye, using years of experience and muscle memory to intuit the ideal string slot spacing on the nut. For the rest of us, a specialized ruler marking string spacing can prove to be critical. A good string spacing ruler, like mine from Stewart-MacDonald, will have a series of notches made to accommodate many different neck sizes. Simply line up the outer two notches that you have determined are best for your instrument, and it will tell you where to mark and cut the inner four string slots.
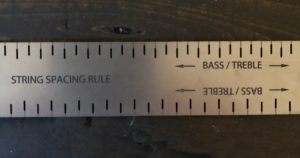
String spacing ruler.
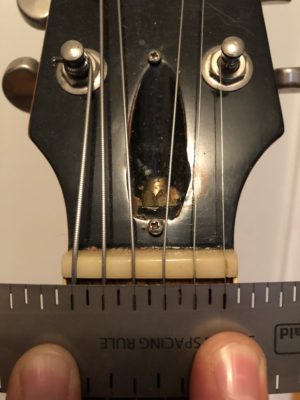
Ruler measuring well spaced strings.
Spacing the rest of the strings can be a breeze, but there is one major pitfall to be mindful of. Your carefully measured nut slot has the potential of “wandering” as you cut deeper and deeper into a nut. Depending on how steady your hand is, or even the angle at which you are holding a file, you may find that your nut slot started in the correct space, but ended up moving to the left or right. You can avoid this pitfall in advance by pre-sanding the overall height of the nut so that you don’t need to cut as deeply per string, or by checking your spacing with your ruler as you go to ensure that you are on track.
2. Nut Slot Width
While the spacing between strings is essential to a comfortable playing nut, it is vital to consider the width of each individual nut slot. The obvious determining factor here is the width of the strings that you want to use. If you have an electric guitar and prefer to use 10-gauge strings, you will want to have six file widths that match the six widths of each string. Acoustic guitar strings tend to be heavier, so you will find yourself using wider files when cutting a nut for an acoustic guitar.

10-gauge electric guitar stings with widths ranging from 10 to 46 thousandths of an inch.

A heaver 13-gauge acoustic string set ranging from 13 to 56 thousandths of an inch.
String widths are commonly measured down to the closest thousandth of an inch, and as such nut files need to be measured to this same level of precision. In making an ideal nut you will want the actual width of the nut slot to match the width of the string exactly. A string whose width is .017”, or seventeen thousandths of an inch, wants to sit in a slot that is exactly seventeen thousandths of an inch. I have learned that in practice you can fudge these measurements a little if you come across a string width that you don’t have a file for. For example, you need to file a first string slot of .010”, but you don’t have a matching file. You will probably be able to get away by using your .012” file.
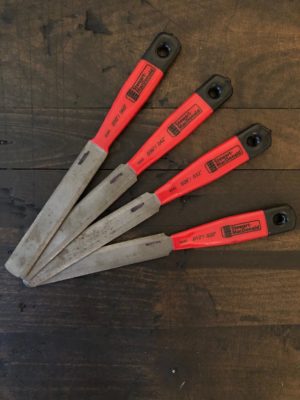
Nut files.
Overall I have found that you have about 2-3 thousandths of an inch that you can widen or narrow a nut slot to match a string width. Any more than this though and you may start to have problems. A nut slot which is too narrow can “squeeze” a string, holding it too tightly and not allowing it to pass freely when tuning the guitar. Unwound strings may prove stubborn when trying to make fine tuning adjustments, not hitting the sweet spot on your tuner but instead always falling on the flat or sharp extremes. Wound strings may prove to be more stubborn and will not move until a wind in the string pops through the slot, causing an audible ping or click when the pressure of the tuning machine forces it through the slot.
At worst, a very narrow cut will not allow the string to sit ideally at the very bottom of the nut slot. In this case, strings edges are incorrectly making contact with the sharp edges of the side of the nut slot, and there is a gap between the round bottom of the string and the foundation of the nut slot. The overall effect that this has on playability is that the strings are too high off the fretboard, making it difficult to fret the lower strings when playing open position chords and scales.
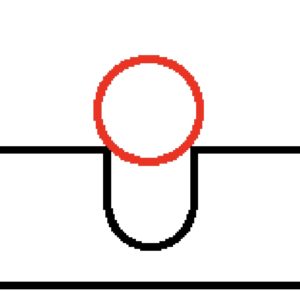
String (red) sitting on top of under-sized nut slot.
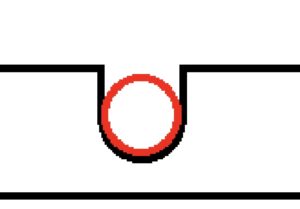
String (red) resting correctly in the bottom of the nut slot.
The opposite extreme would be the nut slot that is too wide. This kind of nut slot proves to not hold the string firmly enough, which can cause the string to rattle in the foundation of the nut slot. The overall effect would be a buzzy string which is the result of the string jangling around in this loose slot.
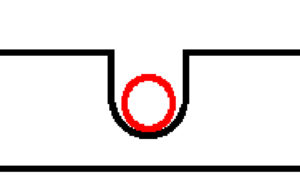
String (red) resting loosely in over-sized nut slot.
A final observation when considering the width of each nut slot is that when cutting a new nut you are actually custom-fitting a gauge of strings to your guitar. If you measure your nut slots to accommodate 10-gauge strings, and have a change of heart down the line and go lighter or heavier in string gauge, you may find some problems. A 9-gauge set of strings may prove to be within the acceptable “fudging” range as mentioned earlier, but may also create slots which are too big for the smaller strings being introduced, thus causing the strings to rattle. If you decide to go the other direction, and find that 11- or 12-gauge strings are your new preference, you may find yourself forcing strings that are too big into cramped nut slots. The new strings you have installed may prove to be difficult to tune, or may sit too high in the incorrect nut slots.
3. Nut Slot Height
The best analogy I can come up with when finding the ideal height for nut slots is the proverbial local fisherman hired to take you and your buddies to the proverbial haunted island. Think The Lost World: Jurassic Park, in which our beloved adventurers are still pretty far off shore, when their own fisherman refuses to go further for fear of being devoured by dinosaurs. Fortunately, the stakes are much lower when cutting a new nut, but there is a similar balance. If the nut slots are too high, fretting open position chords may be uncomfortable. If the nut slots are too low, you will start to hear buzzing as your strings rattle against the lowest frets. The real killer part here is that one swipe of your file may put you over the edge of having the most comfortable playing nut you have ever had, or having open strings that buzz uncontrollably.
- If you look very closely there is too big a gap between string one and fret one. We’re talking fractions of an inch, but this nut slot is way too high.
- The nut slot for string one has been brought down. The gap from before is almost unnoticeable now.
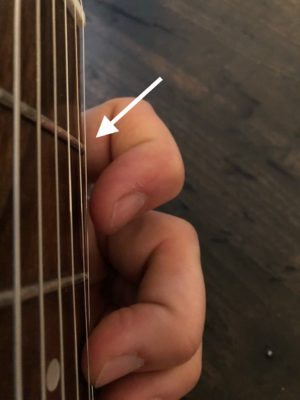
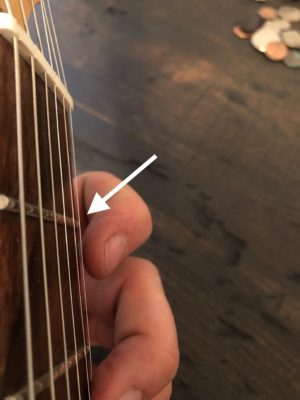
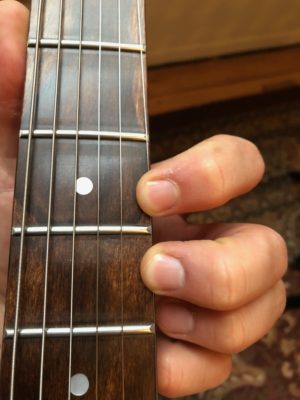
Fortunately there is a quick and easy way to measure the height of your nut slots to guide you towards filing them to an ideal height. Simply fret the third fret with your third finger on the string you are filing the nut for, and use your first finger to gauge the height of the string above the first fret. You will see a considerable gap between the string and the fret when your nut slot is too high. Playability will increase as this gap gets smaller, and the string is held closer to the fret by a lower nut slot. If you perform this same measurement on an ideal nut slot, you will find that there is an almost unnoticeable difference when your first finger is and is not applying pressure to the string.
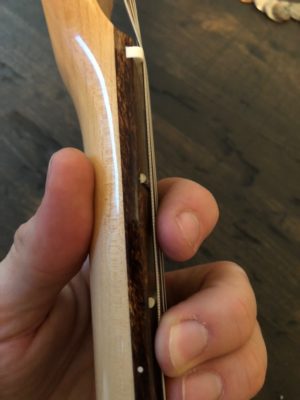
Measuring the nut slot height by fretting the third fret and gauging the distance between the string and fret one.
A “daredevil” luthier will always push the limit when trying to make the ideal nut. There is no knowing for certain whether you are as low as you can go without actually taking material out of the nut. Every pass of your file takes you closer to that proverbial haunted island, and may put you over the edge before you know it. Similarly to being devoured by prehistoric predators, there is really no going back once you have pushed too far past the limit when filing a low nut slot. Since making a nut is subtractive you are only able to take material away. There are tricks to raising nut slots, but if you are really doing an ideal job the only way to “go back” is to start over making a completely new nut.
4. String Angle
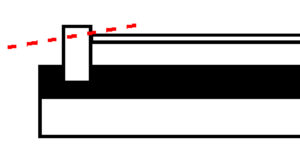
The next consideration when making an ideal nut is the angle the bottom of the string makes when passing from the fretboard to the headstock. Imagine looking at the nut from the side and being able to see through it so that you can see a visible line which is the bottom of the nut slots. You will see the height of the nut slot at its highest on the fretboard side, and then see it angle down toward the headstock.
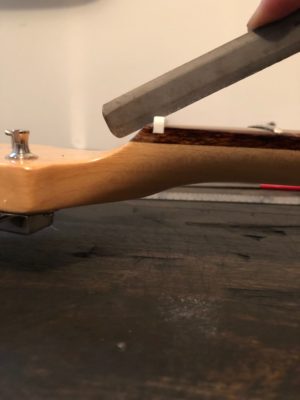
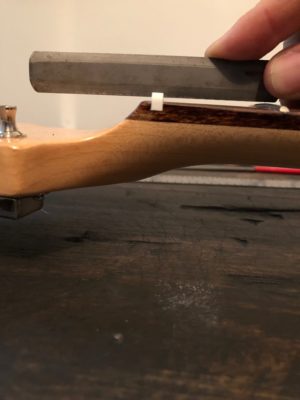
An ideal nut slot will have an angle to it which is approximately an average of the flat angle of the string above the fretboard and the more severe downward angle which the tuning machines pull the string on the headstock. If this angle is too steep — that is it falls too sharply toward the headstock — the string will not lay flat through the entire length of the nut slot. Instead, it will sit on a sharp point created at the junction of the slot and fretboard, and may buzz since it is not being held firmly in place. Having only a portion of the string making contact with the nut may also reduce the amount of sound the string is transferring through the nut into the neck through lack of physical contact.
- This file will cut too “steep” a string angle, which will cause problems when the guitar is restrung.
- This file is probably too “flat” which can cause as many problems as too “steep” a string angle.
- This is a good compromise between too “steep” and “flat,” and will give the string a good nut slot to lay in.
The other extreme is more hypothetical, but involves a nut slot which is angled up as the string passes from the fretboard to the headstock. You can’t hold a fret file with this type of angle without having the handle touch the frets, so this is mainly theoretical, but the results would be the same. The sharp edge created in this situation would fall on the headstock side of the nut slot, limiting sound transmission through the nut and also holding it loosely, creating buzz.
Going back to your ideal nut, you will see a slot angle that accomplishes both things that the wrong ones do not. The string is making contact with the bottom of the slot for the entire trip through the nut. On one hand this gives as much surface area contact as possible for ideal sound transmission from the string to the neck. On the other, the string is being held firmly in place while still allowing for a clear open string sound with no buzz.
5. Fit and Finish
After you have passed through the trials and tedium of the previous four steps, all that is left is the final fit and finish to install your new ideal nut on your guitar. Considerations here are both aesthetic and functional in nature.
Functionally speaking, you want a nut whose bottom edge is making clean and firm contact with the socket on the headstock. Similarly to other steps in fitting strings to the nut, you want to make sure that the bottom of the nut is making as much surface area contact with the socket on the headstock as possible. When accomplished, this maximum surface area will allow for most ideal sound transmission from the nut to the headstock, and also will keep the nut firmly held in place. This will often be done earlier in the nut-making process, but it is worth checking at the end before gluing it in place.
Another functional consideration is how flush the nut is with the edge of the headstock. Having sharp edges of the nut protrude past the width of the headstock can create an uncomfortable situation when fretting low, similar to fret sprout. These sharp edges of the nut scraping against your hand is not as critical as ending up in the jaws of a T-Rex, but is less than ideal. Instead, a perfectly fitted nut will lay flush with the contours of the neck around the nut socket.
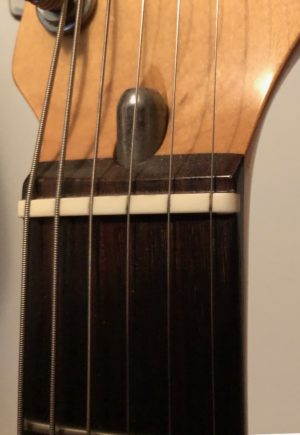
Looking at the right side of the nut you can see how smoothly it fits in with the edge of the fretboard and neck.
A final functional consideration is the shaping of the top edges of the nut. Chances are that shaping the nut so far has left these edges sharp, causing discomfort in playing similar to having the ends of the nut stick out past the ends of the nut socket. A quick and easy step to rectify this would be to round out these sharp edges with some fine sandpaper to reduce discomfort.
From a functional standpoint your nut at this point is complete, aesthetically though the signs of your work may still be visible. There may be filing marks from shaving down the top of the nut or from narrowing the width of it. This is the best point to put a cap on your work, or make a statement, by polishing the entire nut with a fine grit sandpaper.
At a glance, a nut may seem like a trivial or insignificant contributor to the sound and playability of a guitar. When you take a closer look you really start to open a Pandora’s Box of variables and possibilities that can make or break the functionality of your nut, and in turn your entire instrument. In making a nut it, is worth taking the time and consideration to ensure that all these facets of it are as close to ideal as possible. For everybody else not trying to make one on their own, it is worth knowing the ins-and-outs of what makes a nut perform best to identify an important area where your favorite guitar could be even better.

