Anyone who has played acoustic out knows the struggle — a 10-year-old DI box brings your guitar signal to a front-of-house tech and you just pray they do you right. A pedalboard for your acoustic can help to alleviate some of the classic acoustic player woes by providing a quality, treated signal to your audio technician! Plus, pedals can be a great way to get a high-quality recording signal chain in the studio, whether you are going DI, micing your guitar, or blending the two capture methods. Let’s take a look at a few simple rules you can follow to get a great mix right off the board.
Channel Strip on the Floor!
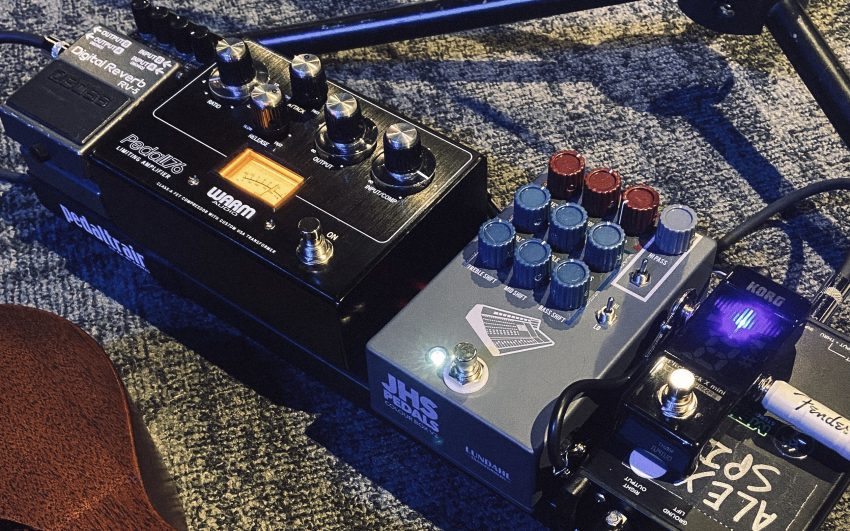
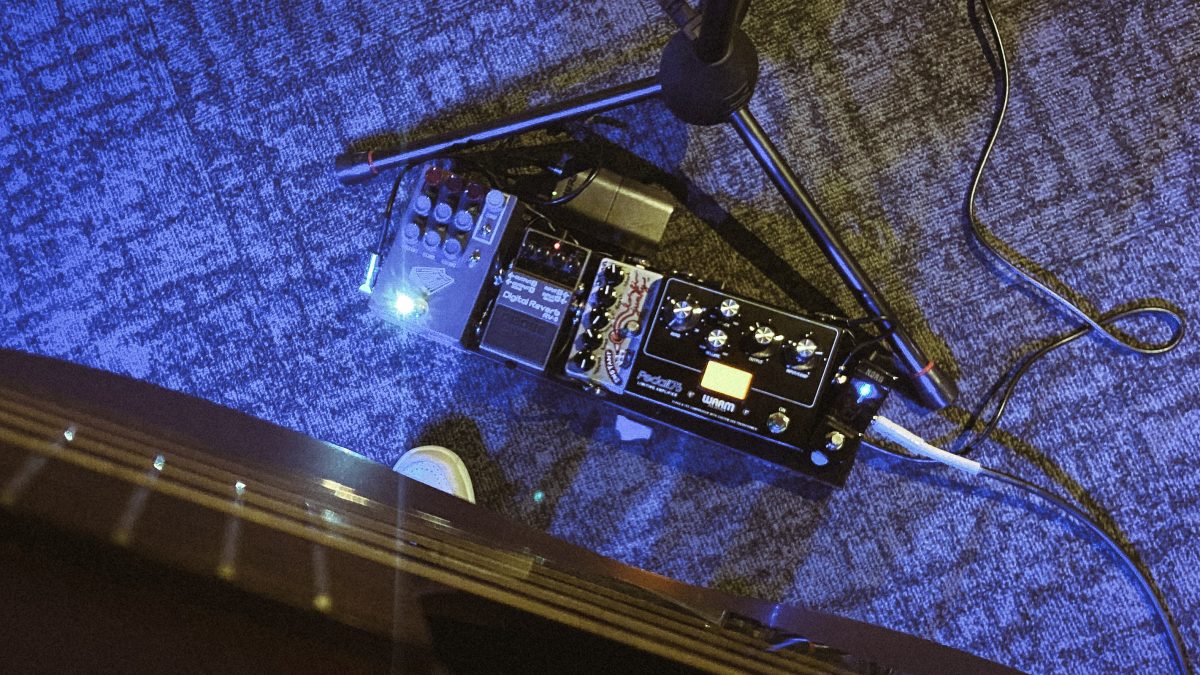
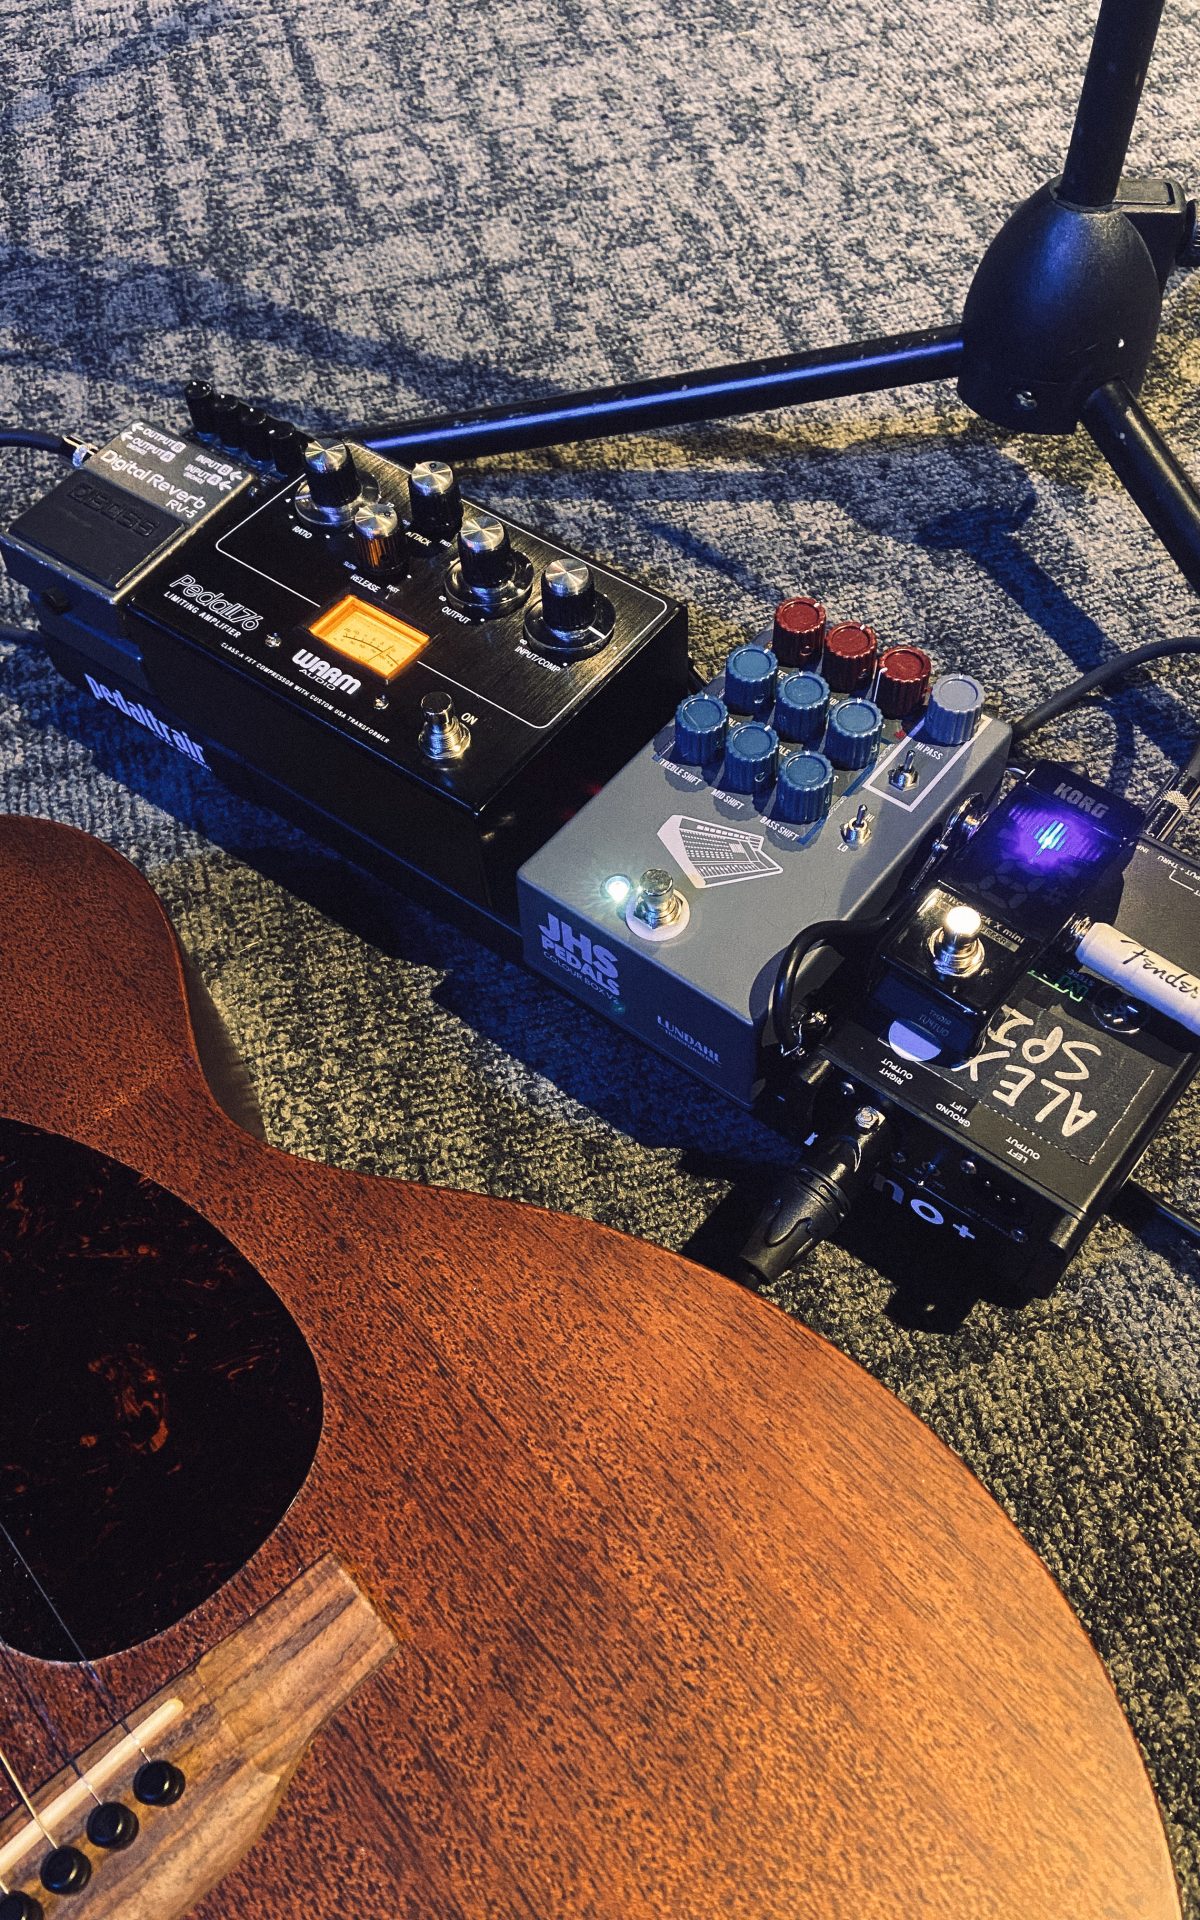
My philosophy in setting up this acoustic pedalboard was to keep things small but robust, focusing on getting tons of tonal shaping power instead of piling on effects. As a studio dude first, I was mainly looking to replicate a channel strip-style approach to my board. Think preamp, eq, compression, then effects.
I chose pedals that provide really high-quality options for my main tone shaping modules. The two main workhorses on this board are the JHS Colour Box and the Warm Audio Pedal76 Compressor. The Colour Box is essentially a Neve 1073-style preamp in a box with tons of clean headroom, selectable gain stages, a highly musical EQ section (that is intuitive to anyone used to studio-style EQs), and a hi-pass filter. The Pedal76, similar to the Colour Box, emulates a studio-mainstay compressor in the 1176 compressor. This responsive compressor pedal is useful on literally any channel, but works well for acoustic when dialed in with a nice, smooth compression.
And My Signal Chain Goes Like This:

Our acoustic pedalboard starts with a pedal tuner, the Korg Pitchblack X. This acts as a tuner and killswitch with a small footprint.
The guitar then goes to the Colour Box. Here the initial gain stage is set, dialed in for plenty of clean headroom but a nice signal boost to go to the compressor. The EQ is set here based on your specific instrument. For my Martin 000-15m, the tone is just sweetened enough with the tonal coloring the pedal provides, so the EQ work is minimal. I also highly suggest engaging the hi-pass filter to tame your low end as this is the most notoriously abused range in a live setting.
Next the guitar goes into the Pedal76, set for a fairly slow attack, quicker release, a big gain stage boost, and approximately a 4:1 ratio. A lot of players may favor less compression with an even slower attack, but for my particular style of playing and instrument, this setting was working best for me.
After compression comes effects. For the gig I was playing, I opted to just include a reverb. I went with the Boss RV-5 for this. My playing style incorporates switching between fingerstyle and lighter strumming very frequently, so I like to have a little bit of “always on” reverb, but most sound technicians are going to give you a little reverb at the board as well.
Auxiliary is Primary
For my live board, I went back into a DI that was on my board, a Mackie MDB-2P. Venues will have DI boxes, but I chose to keep one on my board for this gig because this venue runs wireless back to their DI and I wanted to skip that step.
All of this is powered by a Cioks SOL power supply mounted under a Pedaltrain Nano + pedal board. Finding an isolated power supply slim enough to fit under such a small board is a tough ask, but the SOL delivers in spades.
This signal chain allows me to shape a really high-quality clean base tone to send to the board. By boosting the signal up after my filters and EQ, I also give the FOH team plenty of headroom to work with on their end. This leads to less feedback issues, less sloppy EQing, less over compression, etc.
There are a few other ways you can set up this pedalboard for live use. You could always use the Colour Box at the end of your chain as your DI. I do this sometimes if I want to have a little more space on my board BUT I really like to have my main tone-shaping happening pre-effects. An EQ at the end of your chain may neuter some of the cool frequency changes your effects can provide. That being said, some people prefer to have an EQ at the end of the chain as an ultimate stop gap.
You could also play around with your effects for whatever is best for you, including modulation pedals (I used the Instant Lo-Fi Junkie on a recent board), multiple time-based effects like delays and reverbs, or additional spot filtering for certain songs.
Let’s Head to the Studio
Now for the studio! A basic acoustic signal chain would include the same building blocks we have already outlined in pedal format. The Colour Box and Pedal76 work just as well as line-level pedals, meaning you could save yourself some space on outboard gear by using these pedals as your channel strip in the studio. I also find that recording acoustic both DI and mic’d and blending the signals gives you tons of tonal options in production.
For this exercise I used the same pedalboard setup as earlier and went DI with my Martin 000-15m and also with a Gretsch Jim Dandy. The Gretsch has a much different tone (a parlor with flatwounds and a much cheaper pickup system) which required a very different type of tonal treatment, but the same pedals were helpful for both. I used a Lo-Fi Junky as a chorus pedal, but you could always mess around with other time-based effects like the Earthquaker Devices Avalanche Run.
Find Your Sweet Spot
There are plenty of great options out there for a cool acoustic pedalboard! Tinker around until you find the setup that is right for you. I find the priority is shaping your tone into something great, but messing with effects on acoustic is a game changer as well. Either way, just play!


Leave a Reply