Sample libraries have come a long way and I can’t deny it, but there’s something beautifully organic about capturing live acoustic instruments. It’s similar to the pictures you take on an old disposable camera. That being said, nobody likes seeing a zit in their photo.
I’m going to show you how I find the happy medium between reality and perfection. In my last article I talked about recording an old upright piano. I’m very pleased with the mix of the microphones in that recording, but I can’t deny that the sustain pedal is a little too noisy. I don’t mind it being somewhat present because, after all, that’s the way that some natural pianos sound. But I wanted to at least remove some of the high frequencies in the pedal sounds, basically stopping it from jumping out in the mix. To do this, I’m going to use iZotope’s RX 7.
My go-to tool for this fix ended up being the “spectral repair” tool. This tool replaces the information you’re trying to remove with the audio information around it. It’s sort of like removing a weed from your garden — you yank it out and then push some of the surrounding soil into the empty spot.
My process of fixing these imperfections can be broken down into a three step process:
- Locate the portion that you’d like to remove on the Spectrograph.
- Find the best tool you can use to highlight only the chunk you’re trying to remove.
- Decide which “spectral repair” function you’d like to use.
Step 1: Locate the Blemish
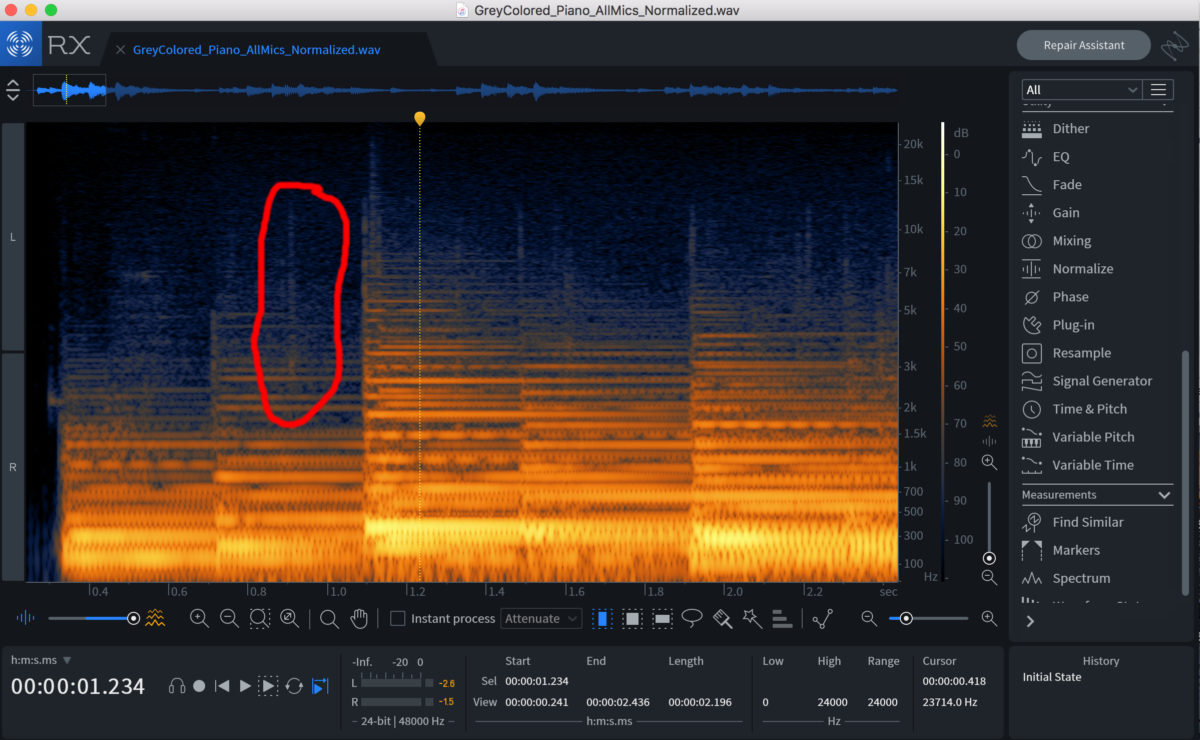
This part is easy because, as an audiophile, I have no trouble finding portions that bother me. In fact, sometimes our job as audio engineers is to pick out the imperfections that nobody else seems to notice. For this recording, the sustain pedal can be heard immediately after the pianist strikes the second note. Easy to hear, but now let’s find it visually.
When I first load my file into RX 7, it’s displayed as two separate audio files. That makes sense, but it also makes it really hard to see the high frequencies because they are located at the top of the image in a Spectrogram. I recommend hitting the little arrows that point towards a line in the top right corner. It’s a tough button to describe so I circled it to make it easier.
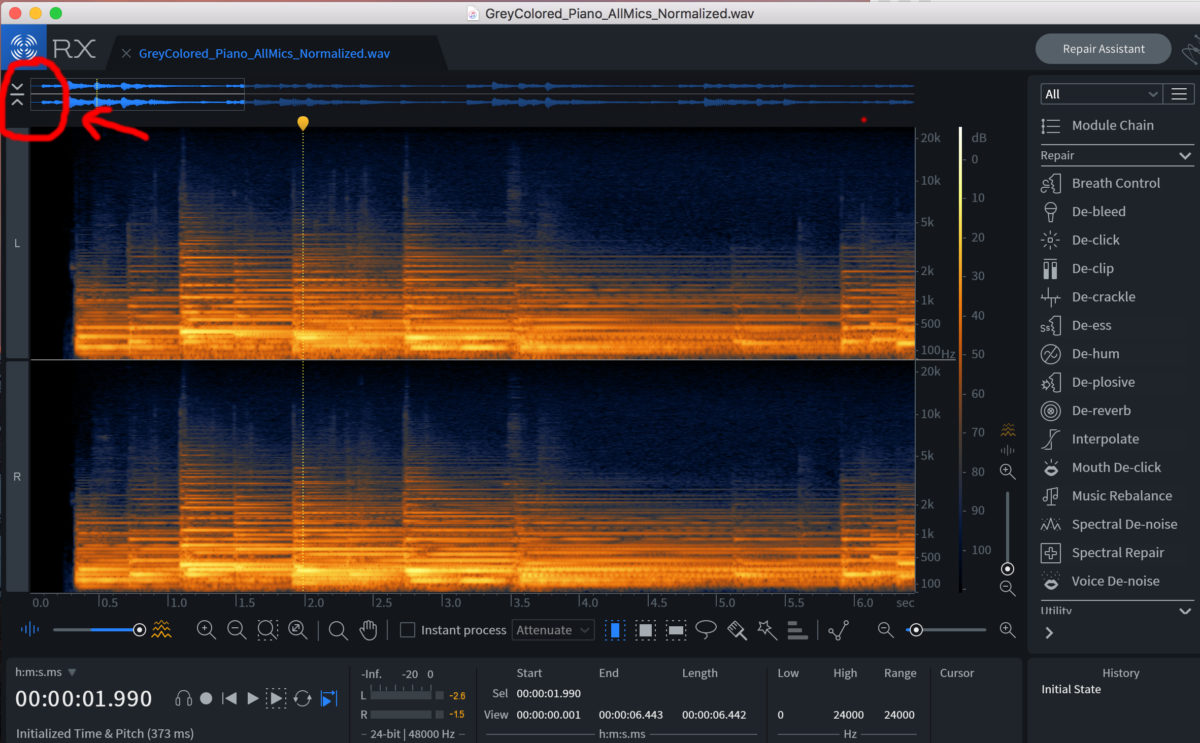
Now the little click/squeak sound is rather easy to find once we locate the transient formed by the second note that our pianist played. It’s shortly after that second transient. It looks like a skinny spike because it’s essentially a transient with no sustain, I circled it to show you where it is. The act of locating these imperfections can be hard at first, but once you see the first few you will start to notice a pattern.
Step 2: Selecting your highlighting tool
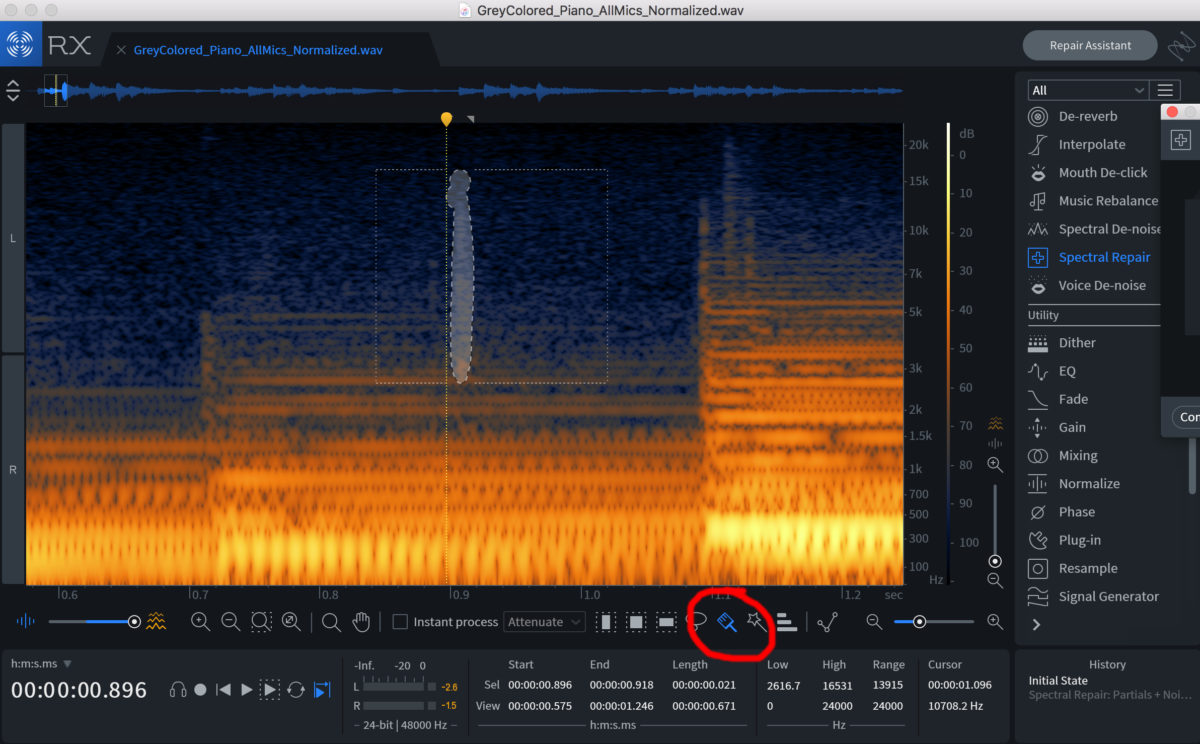
Alright, we have located the offending little portion of audio — now we need to decide which highlighting tool to use. For this application I found myself dancing between the “paint brush” and the “time-frequency selection tool” (the latter just looks like a box if you can’t find it.)
The paint brush is great because you can zoom in enough so that the width of the brush is the exact width of the little click. If you hold down Shift, you can expand the highlighted portion if it doesn’t initially get the full chunk you’re trying to fix. For the most part, I only highlighted the parts that were above 5kHz because I did not want to mess with the natural sustain of the piano’s note.
Step 3: Selecting the type of “Spectral Repair”
This step is honestly just lots of trial and error because you want to choose an option that removes a lot, but doesn’t add artifacts. In case you don’t know what I mean by “artifacts,” I have made a version where I really overdid my attempts. For the most part, I found that the “Partials + Noise” option within the Spectral Repair tool was the best option because it removed unwanted noise in the cleanest way and it was the least noticeable. I occasionally switched to the “Replace” option as well.
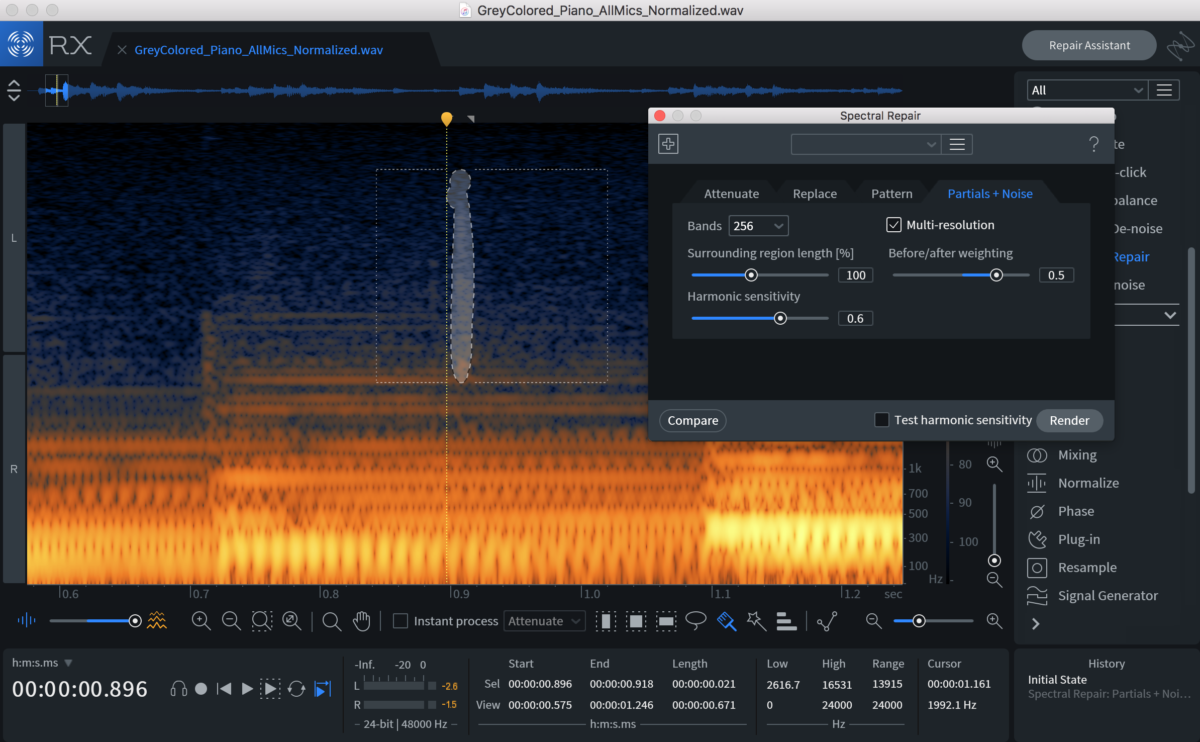
After you’ve chosen between the four types of spectral repair, you will also want to dial in your parameters. For this specific application, I found that using 256-512 bands was less noticeable. The before/after weighting is also a very crucial parameter because it helps determine where the replacement audio might be coming from. I chose to grab more of the replacement info from the portion after the clicks.
Below you will find, first the original recording without any Spectral Repair applied. For the next track, the first half of the recording has the clicks removed and the second half does not. When the second half starts you’ll immediately notice how much the pedal noises were affecting the listening experience. To get even better results I recommend doing this to every individual microphone, then mixing the fixed files together. It’s time consuming, but that will give you the least noticeable fix. Also, I left a really poorly “fixed” example for those who want to know what it sounds like when you’ve gone too far.



Leave a Reply