
Voiceover artists are often solely associated with cartoons, commercials or audiobooks by most average consumers. But in today’s content-driven world, voiceover or VO has become incredibly important for things like live streaming, general branding and broad marketing. If you’re creating content with voiceover, whether you do the read yourself, or you bring a professional VO artist into your studio, you’ll need to know the basics of recording, mixing and mastering a vocal. Let’s look at the main stages in mixing a great voiceover for your next project.
Compression, Manipulating Dynamic Range
A great voiceover starts and ends during the recording process. It’s obvious that if you don’t have a great talent behind the mic you won’t have a great VO at the end. But second most important will always be compression. Compressing a vocal is the process of reducing the dynamic range of the original raw recording. When decreasing the dynamic range of a sound clip, you are in turn decreasing overall volume. However, the great thing about compressors is that they can also increase output gain to correct this.
To start, listen to your vocal in your DAW, and examine where it peaks at your desired volume. This is where the threshold control comes into play. The threshold is the set level above which your compressor turns on. Typically you want to start this at 6-10 dB below the average signal level you are seeing on your VO. After this, increase your compressor’s ratio to 2:1 or 3:1 and see how each feels. Setting ratio equates directly to the input to output of gain reduction in ratio form, essentially starting at a mirrored 1-to-1 of input to output decibel level, and changing to whichever ratio you select.
After this, the next step is setting attack and release. This is usually a great place to play around with the compressor’s limits and see how it sounds in context, but a great place to start is with an attack time that’s not too fast or slow, but somewhere in the middle, around 1-5 ms. The release time is important for the ending of sentences and certain words in the VO, so something near 10-15 ms works great for a middle of the road approach. Now all that’s left to do is increase output gain to match the desired volume of your project and you’re golden.
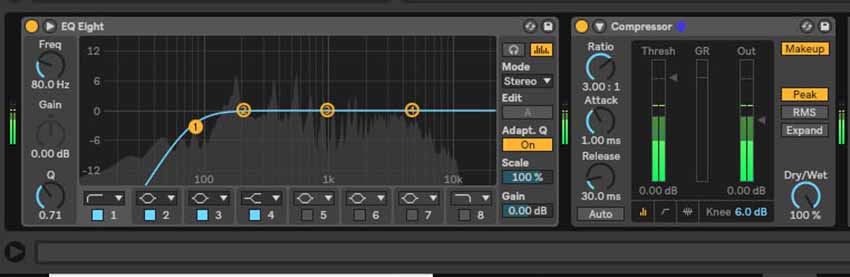
Ableton Live 10 EQ Eight and Compressor.
Equalization
After compression comes EQing the vocal. EQ or equalization, helps emphasize the good parts of your mix while suppressing the bad. EQing a solo VO is great practice for future projects with a full band mix, because subtlety is key in this situation. The listener needs to hear one voice convey all the points this VO is trying to get across — they are not concerned about the warmth of the vocal, they just want the information it’s trying to convey.
One technique most mix engineers embrace is subtractive EQ. This is the process of subtracting the unneeded frequencies rather than boosting the needed ones. For instance, you should always cut frequencies in the sub-bass range to limit the “room noise” rumble that comes from the literal walls around you. This will in turn create clarity on the high end of the vocal without no boost needed. Something between 40-80 Hz is a good place to start with this cut, because it gives you some room for the low-end “warmth” that a lot of VO clients want. If the talent has a higher voice, these frequencies are inconsequential to cut, but if the talent delivers a low-voiced, movie trailer-like read, then flexibility on the low is paramount.
More cuts can be made around 100-300 Hz for additional clarity, and if the mids sound a bit slushy or muddy, begin to cut between 300-400 Hz. Now if the vocal is still slightly unclear, you can boost frequencies from 2-6 kHz, but be careful as this will add too much heat to higher-pitched VOs.
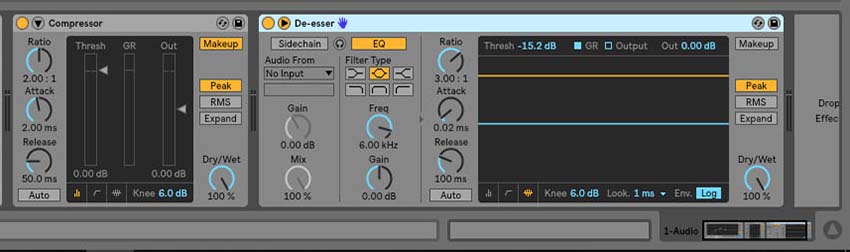
An example of Ableton Live 10 DAW Compressor and De-esser.
Setting Gate and De-essing
Once the EQing is all set you can move on to the polish of the track which includes setting a gate and de-essing the track.
First, noise-gating a VO is extremely important for long format podcasts, line reads and even livestreams because you are essentially “setting and forgetting” a threshold for decibel level on the track. This will continue to function on the entire track and only allow a certain decibel level from your voice to open the noise gate. Start by taking a look at the average decibel level of the talent’s voice on the track. Since you have already compressed and EQ’d the vocal this should be pretty simple. Much like a compressor, a noise gate is set based on threshold of the track, so this average decibel level can be input in the the gate and fully isolate anything above that level while squashing out all below (such as room noise, keyboard clicks, mouth noises, etc.) Typical DAW plug-in noise gates will use most of the same perimeter controls as a compressor, so since you’ve already set threshold move on to attack and release. Since a noise gate can be detrimental to your track by squashing out some of the actual vocal, setting a looser attack can save you the headache of heavy editing on a quieter voice line.
Now that the track is sounding nice and tight, you can move onto de-essing. De-essing is the process of reducing the gain on certain harsh syllables like the letters S, T and H. The process itself can be covered with dedicated plug-ins on most of the major DAWs as well as third-party VSTs, but it is essentially reducing gain level any time sibilance occurs. Sibilance is the acoustic characteristic of certain consonant sounds with higher amplitude and pitch. This can be done manually by isolating the line in the mix and reducing gain. You can see how this would be an issue for any long format tracks like podcasts; this is why finding a dedicated de-esser is so important to have in your mix repertoire.
Though a raw track can work with the right talent and microphone, the hard work after recording and in the mix is what makes each track really shine.


Leave a Reply