Welcome to Beat Connection, a series dedicated to promoting modern and vintage dance styles the only way we know how…by providing you a musical starting point to help you create that beat. In the main bulk of our posts, we’ve been taking you on a journey to what I’d dub “foundational beats.” These foundational beats are standard rock, pop, funk, R&B, and dance beats that every producer should know the ins and outs of. In our previous post, we looked at the production techniques behind some of dub music’s most exemplary tracks. Today, we’re coming back to America to understand how trap production techniques transform hip-hop music.
Infinitesimal gradations.
- Brian Eno, from Oblique Strategies
There is a divide out there. There is a divide between those that think trap music isn’t real hip-hop and those that consider it the hardest form of it. Trap music gets its name not so much from its iconic sound but from its origins in the hard-nosed lifestyle of the originators of that sound. In the minds of production crews that’d help create trap classics like T.I.’s Trap Muzik, Future’s DS2, and Freddie Gibb’s Shadow Of A Doubt — to name a select few — the many conflicted lifestyle which gives life to this music meets a sound deeply intwined with that state of mind. The sound of trap music is slow with booming sub-bass kicks cornering the music. Inside that sound block, you hear rolling hi-hats streaking by, contorting themselves into hits that seem inhumanly possible to pull off. The bare arrangement, that’s left in that wake, is filled with atmospheric, melancholic synths that seem to counter the entirely aggressive sound base.
Trap music has many roots, you see. Contemporary trap has increasingly taken ideas from EDM — drops, builds, and huge, gliding synth leads. Go back a few years — if you can imagine such a short time frame — and think about early trap music. Earlier trap music drew from its roots in southern hip-hop made by the likes of Goodie Mob, Scarface, and Lil Jon. These roots were far more beat driven and (at times) headier in production style. Trap music tries to meet a lot of ideas halfway.
Technically, what truly made trap blossom wasn’t solely the TR-808’s kick drum but the Akai MPC’s note repeat function. “Note Repeat” allows anyone without finger drumming skills to easily fire off 1/8th, 1/16th, 1/32th, and 1/64th note drum hits. It was this rolling pattern that would give trap music its ace in the hole.
Yeezy had it right, one thing you can’t escape from is that this is music full of 808s and heartbreaks. Our goal today is to get you acquainted with the tools and techniques you can use to create music in that style. Parental Advisory isn’t required but is possibly necessary…
NOTE
Just a refresher, in case you haven’t gone back to the Beat Connection archives, what we’re going to use to help you create beats is something called Grid Notation. If you don’t know what Grid Notation is, be sure to check out the first post in this series which you can find by following this link.
By understanding and sequencing the following three drum patterns (A, B, and C) you should be able to expand upon each by adding additional parts, removing hits, or layering other instrumental grooves over them. As always, the A section will correspond with the main pattern which normally the verses or main melodies play over. The B section will correspond with the groove you’d normally hear playing during the chorus or pre-chorus of a song. Finally, the C section will always correspond with the break in a song. C sections are perfect for building bridges between song sections or to break up the monotony of any other sections.
If you need any refresher on what A, B, and C sections mean (and how songs are built using patterns) be sure to check out this previous Beat Connection post explaining the ins and outs of Song Structure.
TRAP – BEAT
Below you’ll find the beat we’re intending to create. Note the common concepts — fat, spacious kick, rolling hi-hat cymbals, and snappy clap and snare — that you’ll find in most trap music. Our goal is to get you closer to making something in this style, with fully-fledged production techniques that actually get you there.
TRAP – TECHNIQUES
Trap is all about minimalism accentuating things to their maximum. Here is a list of the things to look out for and to create.
TEMPO
Trap music is slow music. Hovering from 70-95 BPM (or double it, from 140-180 BPM), make sure to set your sequencer to a tempo that is decidedly slow. Choose the higher tempo for more minimally arranged tracks.
SUB-BASS KICK
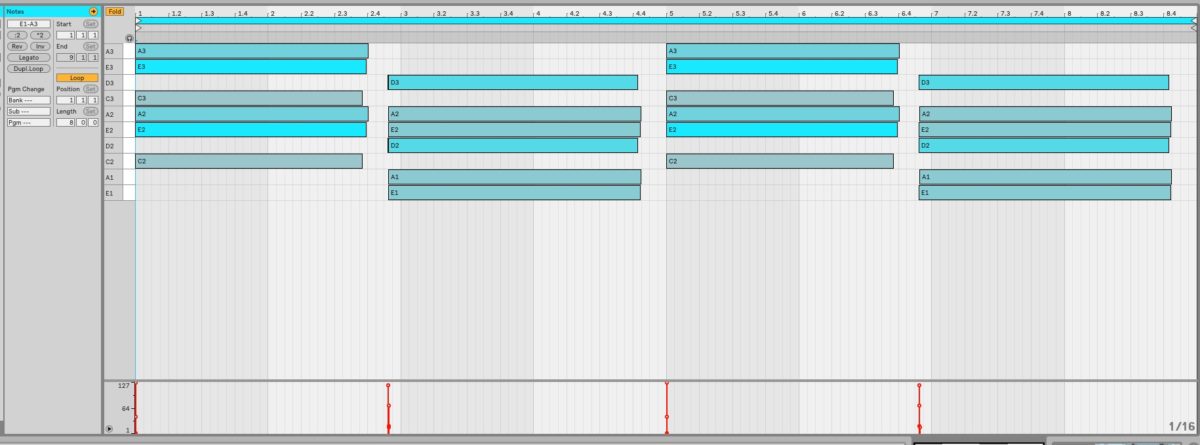
Trap music truly centers around two things: a massive bass kick and rolling hi-hats. In order to achieve that tonality of a kick one actually has to work outside the drum. What does this mean? It means you layer a low-frequency bass line to pulse with every bass drum trigger. Above I used Ableton Live’s Wavetable synthesizer, one of Live Suite’s newest virtual instruments, to pulse the following sequence, using the Command Boom Kick preset:
Let’s break down what’s happening. First, we’re hearing a sine wave with a very quick attack experience a frequency lift a bit later in its sonic tail. That little snap gives it the illusion of a bass guitar resonating just a bit as it’s playing a particularly low frequency note. It’s a very subtle effect that when combined with a kick drum (in this case one from Kit-808 Magnetikz) gives you more oomph to explore. Take a listen to the following clips. The first clip is a dry kick and the second shows the difference with that sub-bass synth layered over it.
DRY KICK
SUB BASS AND KICK
However, we can’t end it there. There’s a way to make this kick even fatter. You do this by applying a Sidechain Compressor to the drum kit channel. In this case, I dragged the Acoustic Kick Compressor, Compressor preset into effect and turned on the Sidechain button and set it to receive Audio From the Command Boom Kick channel. Within the Compressor set the Lookahead setting to 1ms and voila: make a snappy, fat kick, sound even fatter and crispier. In effect, what we’re asking the kick to do is to remain open as long as the Sub-Bass is grumbling around. Take a listen to the following two clips. The first is dry, sans effect. The second is with the effect applied.
SUB-BASS AND KICK (NO COMPRESSION)
SUB-BASS AND KICK (WITH COMPRESSION)
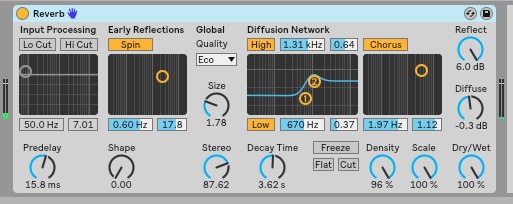
But we can’t just end it there, even! What you’ve been hearing so far has been a kick with Reverb applied. You do this by clicking on the Chain Mixer Fold button on your Drum Kit’s Clip View and going down to the kick’s column to adjust the send amount going to the effects return (which is where I place the reverb effect). You do not want all hits to get the same reverb effect. Great tone only applies the effect to the sounds that would benefit from it. Without reverb, you tend to lose the spacey/hiphy quality a lot of trap music traffics in. Take a listen to the following two clips without and with reverb on the kick, to hear the difference.
SUB-BASS AND KICK (WITHOUT REVERB)
SUB-BASS AND KICK (WITH REVERB)
ROLLING HI-HATS (NOTE REPEAT)
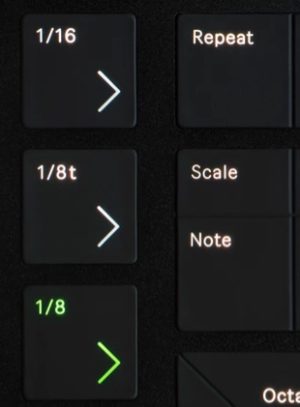
Moving on to the second most important element of a trap track, we get to the iconic rolling hi-hat cymbals. Take a listen below to an isolated mix of these hi-hats going through a sudden change from an eighth note pattern, to a 1/16th and 1/32nd note pattern. If you’re the proud owner of an Ableton Push, Maschine, or Akai MPC this is an effect easily achievable by on-board “Note Repeat” buttons that trigger the samples just so, at the press of a button.
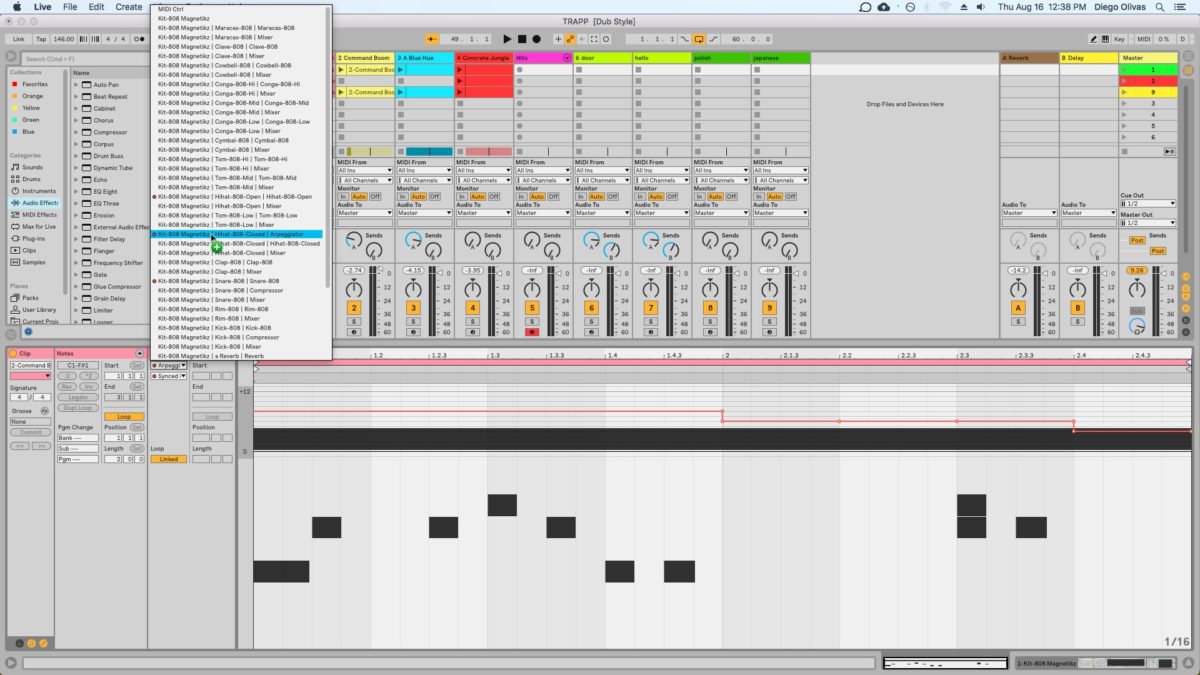
The question is: How does one achieve that effect without a controller with that feature? With Ableton Live it’s easier than you think. First, on your Drum Rack, you drag into the cell of the drum hit you want to affect a Note Repeat on via the MIDI effect Arpeggiator. Ableton Live’s Arpeggiator does many useful things, but for drums it does basically one thing: repeat the trigger.
Using the Rate function is where you actually start to imitate the rolling hi-hats triggered by Note Repeat buttons. What you do, is rather than pencil in or enter every hi-hat you want, in the time division you need, you actually use Parameter Envelopes to draw in the the timing you need for the duration of the time the note is staked out in. This is easier explained in a series of images you can see (and click to enlarge) below:
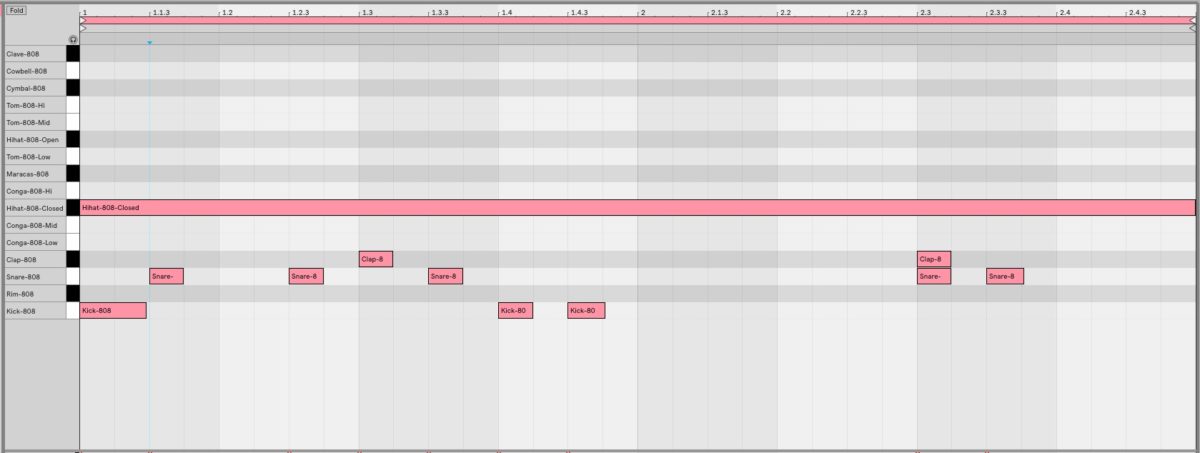
Above you see the main pattern. Notice how rather than drawing in the Closed Hi-Hats, I drew one trigger, that I stretched out across the expanse of the clip. This covers how long the Arpeggiator effect will be applied. Then I opened up the Envelopes Box to access the Arpeggiator and its Synced Rate envelope.
Within this selection I will create a slope that will mimic the feel of a Note Repeat selection. You do so by clicking within the entry window and creating breakpoints that will signal a change to a different value. In my case above, I made it go from 1/8th to 1/16th notes, and finish in 1/32nd repetitions. To make the feel more realistic, create horizontal changes, rather than using a diagonal slope, so that the shifts don’t go between triplets or other repetitions that aren’t simple divisions of 1/8th notes — unless you want them. In other words, avoid creating a slope that includes 1/8t, 1/16t, 1/24th note divisions within it.
Your finished drum tone should sound something like this:
PITCHED DRUMS
We’re getting closer to ending our trek through the most important pieces of trap music. One can’t forget another important piece: pitched drum. In many ways, what people love about a “drop” is really what foretells the drop. With drums it’s easy to affect this by once again using envelopes to swiftly transpose and re-pitch a drum hit that is particularly hot. Take a listen to the samples below to hear the pattern dry, with and without the snare pitch drop.
SNARE DROP (WITH PITCH DROP)
SNARE DROP (WITHOUT PITCH DROP)
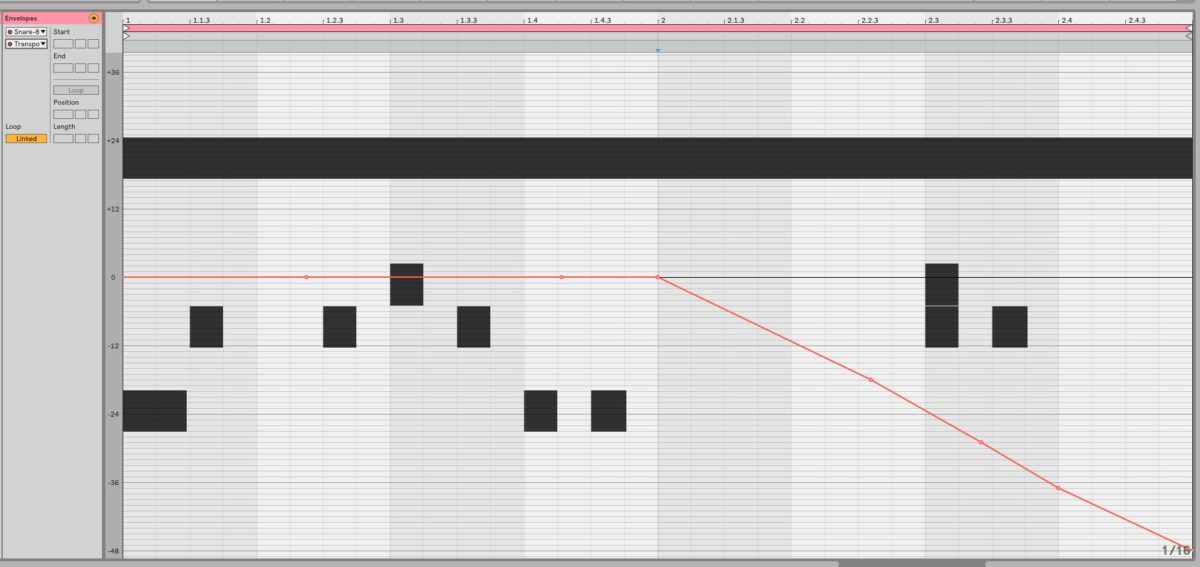
You achieve this sound by once again turning to Ableton Live‘s Envelopes view. This time around we’re choosing the Snare and within the snare we’re selecting Transpose as the parameter to change. In my case, I created a diagonal slope from the mid-point of the clip to go from 0 to -48 st. — a huge transposition change.
TRAP INSTRUMENTATION
Trap really builds on the beat and normally remains quite economical in terms of what embellishes the arrangement. Since the focus is on the rapper and the beat, things like string pads, moody, melodic keys for leads, and most importantly one-off “hype” samples (see: any of DJ Khaled’s meme-worthy call outs, or the sounds of closing doors, or police sirens, etc.) are options to sprinkle in. Below, you’ll find what I used on the final example to round out the beat:
STRING PAD – A Blue Hue (Wavetable)
MELODIC KEYS – Concrete Jungle Kalimba (Tension)
ONE-OFF SAMPLES – HYPE TRACKS (Drum Rack)
DOWNLOAD ABLETON LIVE PROJECT FILE – TRAP PRODUCTION
All images and sound samples by author.







Leave a Reply