Controlling dynamics during the final mixdown can sometimes feel like a compromise, especially on instruments with wide dynamic ranges. Drums, bass, and vocals often produce loud signal peaks that can cause issues when trying to compress the signal. Sure, you can try to put a limiter on the offending track, but that has the possibility of sterilizing the life out of what could have otherwise been a great sounding performance. On the other hand, by not adding compression to these dynamic tracks, those peaks might cause the track to distort, which, with regards to digital recording, doesn’t really sound that great. Riding the volume fader is a common compromise between the compression/no compression camps, but doesn’t work too well unless you know when all the little peaks and valleys happen on your track.
When confronted with these types of issues, one of my favorite techniques to employ is something called parallel compression. This technique was used by so many engineers in New York City back in the day that it also has the nickname of “New York compression.”
In a nutshell, parallel compression requires at least two different tracks: the uncompressed original track and an auxiliary track that has been squashed to death from a very lively compressor. These two tracks are then played at the same time with levels adjusted to taste. The beauty of this technique — in my opinion — is the ability to retain all the dynamics and transients of your original track while keeping your overall signal tightly controlled.
In this installment of Studio Solutions, I’ll show you how to set up parallel compression in Pro Tools, and you’ll get to hear how it sounds on a drum kit.
The Uncompressed Track
In Clip 1, we have a drum kit recorded with only three microphones: a Shure SM7B on the kick, an SM57 on the snare, and an Audio-Technica ATM450 small-diaphragm condenser as a mono overhead. These three sources all have their own track, and I’ve mixed them so they have a pretty decent balance. At first, this drum recording sounds fine.
Clip 2 features an accompanying guitar track that’s been added to give you a better idea of how the kit sounds in a band mix. Again, the drums do the trick of keeping time, but sound-wise, they could use a little help. Let’s treat these drums with a little parallel compression to add a some liveliness.
Setting Up for Parallel Compression
Setting up parallel compression in your DAW of choice isn’t very hard to do at all. I’m going to explain how to do this in Pro Tools, but you can do this in every DAW.
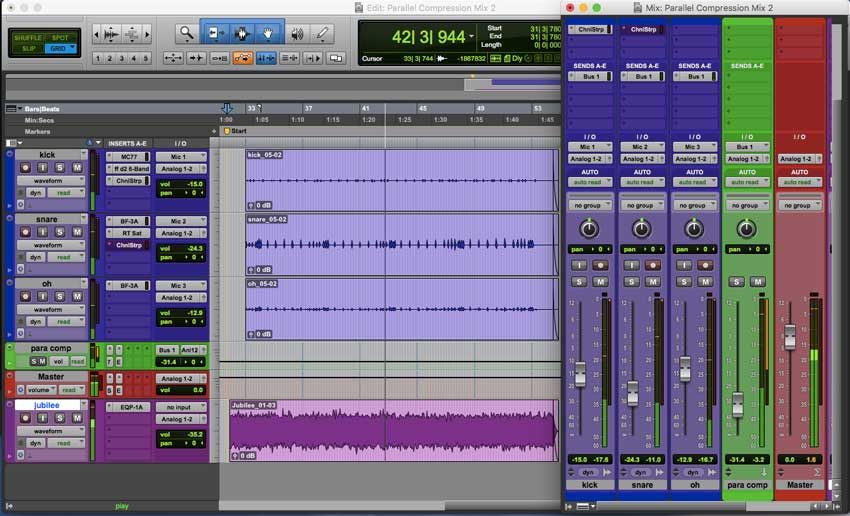
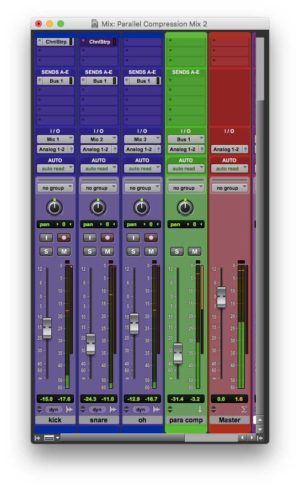
First, create an aux track. In Pro Tools, simply hit Command+Shift+N to bring up the new track menu, and choose a mono aux track. (You can also create a stereo aux track if needed.) You can see the green-colored aux track I’ve created in Figure 1, appropriately labeled “para comp.”
Next, create a send from the track you want to compress. In this case, I sent all three drum tracks to the aux track via Bus 1 then set the input of the aux track to Bus 1 as well. After setting the bus send faders to appropriately feed the aux track, the real fun begins.
On your aux track, you’ll want to open a compressor. Any compressor should work, but I’ve always been an 1176 type of guy, so I went with a Purple Audio MC77. Setting up this compressor the right way is what makes this technique work. If heavy-handed compression isn’t your thing, I’ll politely ask you to stop reading now…
You’re still here? Okay, I’ll move on.
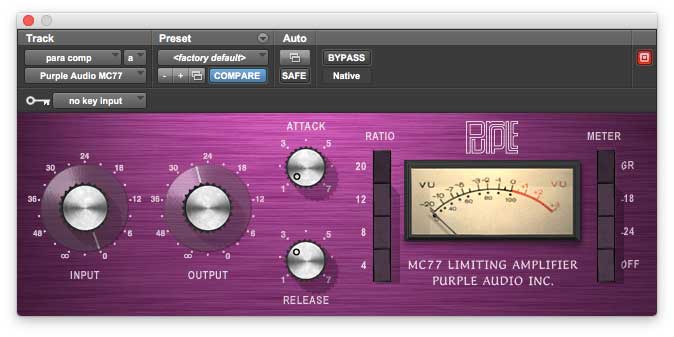
First, I set the input control of the compressor all the way up, fully cranked. (Note: Other compressor models may use a “threshold” control to set how much of the input is compressed.) Of course, this can be set to your personal taste, but I really liked how it sounded here. As you can see in Figure 2, I’m making the MC77 work for its money, pummeling it with -20dB of gain reduction at a 20:1 ratio. I set both attack and release to be pretty slow so the signal never has a chance to decompress. For your own projects, play around with the attack and release enough and you’ll figure out how to make this compressed track “breathe” with the tempo. Naturally, I set the output to a give me a workable signal for the final mix.

Figure 2: Purple Audio MC77. Slamming the input of this compressor creates a squashed signal you can use to parallel compress.
Hearing the Technique in Action
Listening to this track by itself will probably sound like the opposite of “musical.” In Clip 3, you’ll hear that the overhead track has been completely squashed — the transients sound as flat as a pancake while cymbal decay has been hyped and sustained. Luckily, we still have the un-compressed original drum track to work with.
In Clip 4, you can hear the parallel compression finally coming together. The fast transients have been retained by the original track — you can hear that the kick and snare drums still have a strong initial attack. Now thanks to the addition of our compressed aux track, there is also a sense of elongated sustain in drum hits and cymbal decays. Essentially, the parts that were too quiet to hear on the original track have been hyped in volume from the insane setting on the compressor. Clip 5 includes the guitar again, and you can hear how the drums sound a little more powerful within the full mix.
During the final mixdown, you’ll have to use your ears and trust your instinct when balancing the volumes between the dry and compressed tracks. There is no “right” way to mix tracks — the most important thing is that you think it sounds good. Also, feel free to experiment using this technique on other sources, like bass guitar, vocals, or really anything. Now have fun and go record something!


Leave a Reply