Welcome to Beat Connection, a series dedicated to promoting modern and vintage dance styles the only way we know how…by providing you a musical starting point to help you create that beat. Today, we go back to the beginning. In plain terms, we’re outlining how what you see in a drum machine translates to what you’ll find in a modern recording software program.
Our goal is twofold: one is to offer a simple reference guide to use as you learn all sorts of new beats and rhythms. Introducing you to advanced techniques that expand on this guide is our second goal. Note that we’ll use Ableton Live almost exclusively for all our future Beat Connection guides. Our guide and downloadable Cheat Sheet below can help you better understand how to translate these lessons to either hardware or software instruments. Do not skip it if you aren’t familiar with any of these terms!
Understanding Grid Notation
Before we can create a beat, we must learn how to lay one down. On a drum machine and on a software sequencer you’ll always find that one measure of music is shown as sixteen steps in a grid.
Assuming we’re making music in standard 4/4 time, it all comes down to classic notation:
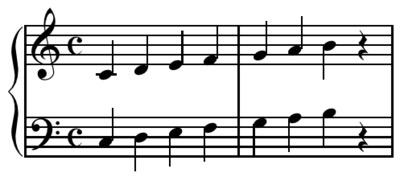
Let’s begin with the four-on-floor beat. Each measure/bar of music can be divided into four quarter notes. In that classic beat, those drum sounds land on the ‘1’, ‘2’, ‘3’, and ‘4’ of “1, 2, 3, 4.”
Composers need a way to specify the length of time between notes and drum beats. Using a drum machine forces you to get away from standard notation. Instrument makers settled on a layout that provides a row of sixteenth notes (“1 e-and-a 2 e-and-a 3 e-and-a 4“) to equal one measure. This layout allows a beat composer to create more intricate arrangements, allowing this…
to translate to the following…
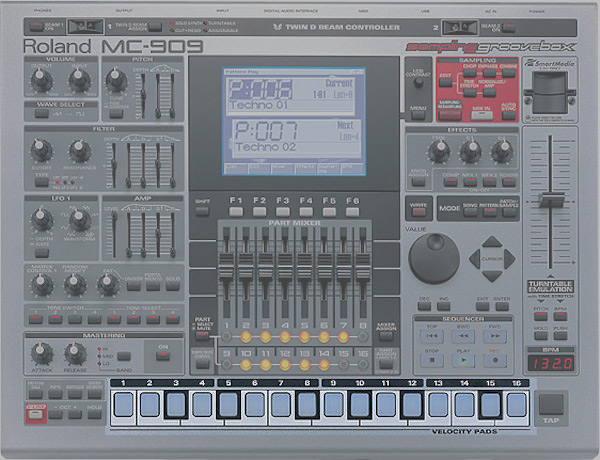
Grid notation is now a de-facto standard composed of 16 drum pads/triggers that line up forming a step in each of the grid’s rows. Step sequencing takes over the classical staff notation view and treats the bottom row as a means to enter notes.
MuSIC NOTATION ON A GRID
With grid notation, a beat composer can place a drum hit exactly on a specific sixteenth note within a measure by placing it on its corresponding step. What one sees in classical percussion notation, as seen here:
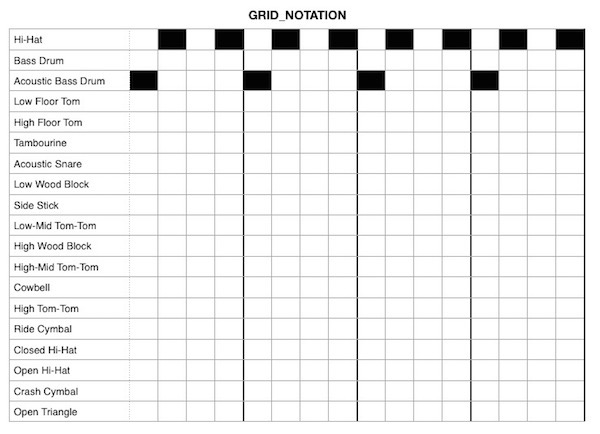
when plugged into a grid system, appears like so.
How to use grid notation
In the grid above, zero-in on the ‘Acoustic Bass Drum.’ This part begins on the very first note of the measure. Three note rests are marked by three empty spaces. In the fifth space, the ‘Acoustic Bass Drum’ reappears. We can finish out the measure by repeating this input two more times. We’ve also added some hi-hat sounds to add more groove, and a look down the list of drum sounds available makes it easy to see just how many different patterns you can create after learning the basics.
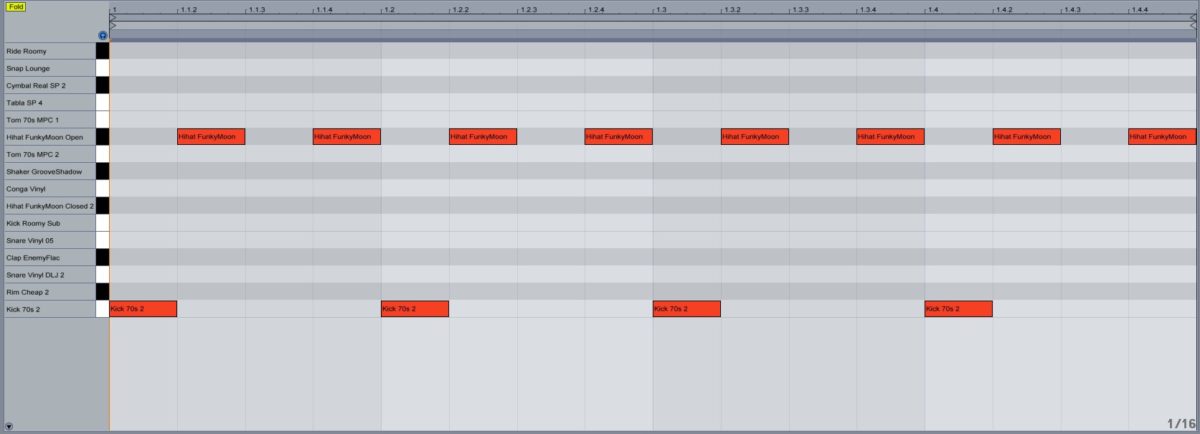
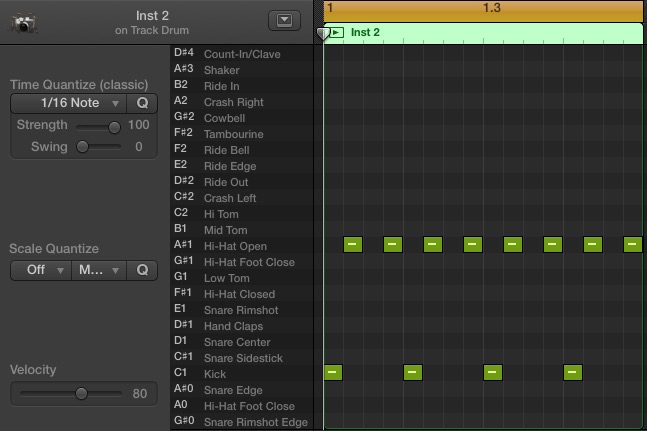
This type of notation makes it simple to enter whole compositions quickly into software and in a step sequencer without having to know much (or any) classical notation. Below, I’ve included a couple examples of this same pattern entered into two different software step sequencers:
THE BEAT CONNECTION CHEATSHEET
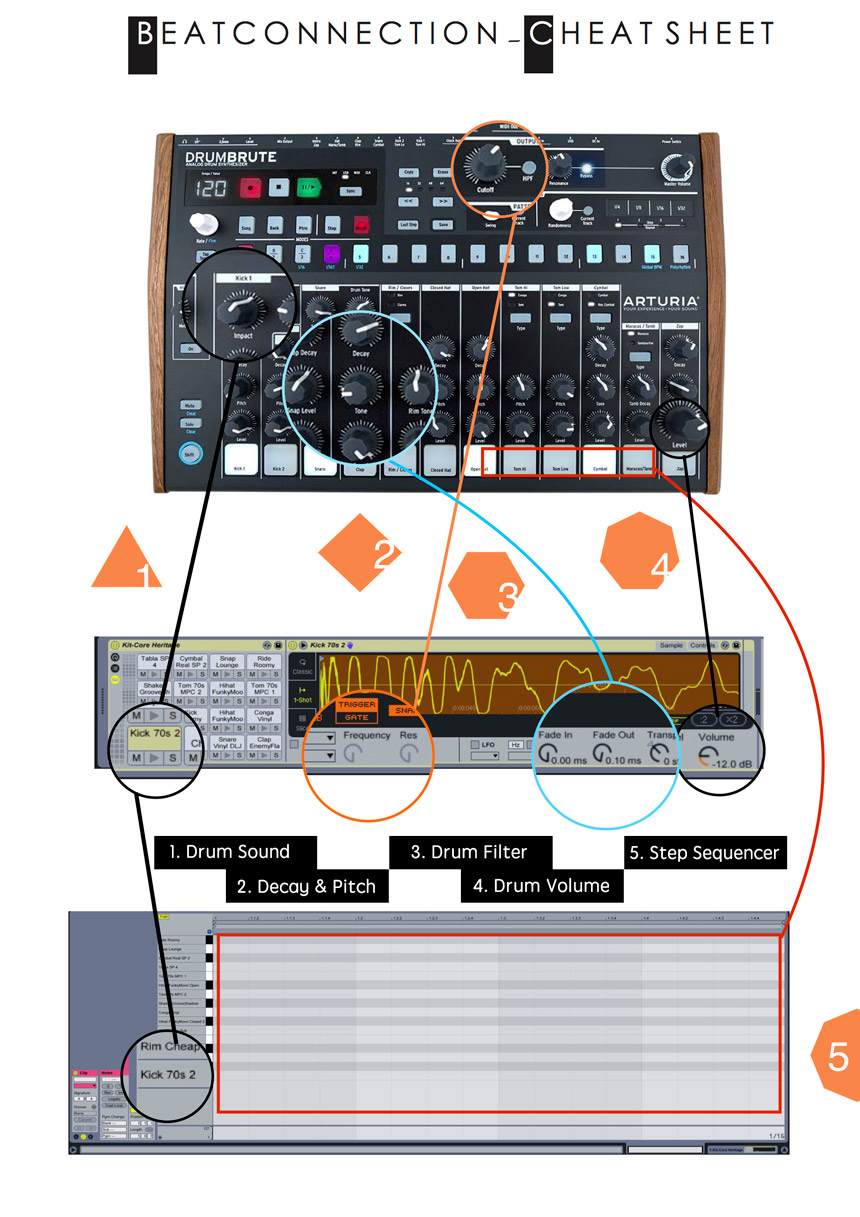
Nearly all drum machines and samplers share a few important controls. We translate those controls to the software world in the Cheatsheet below.
Ableton uses a software instrument called Drum Rack to approximate a hardware-based drum machine/sampler. Our Cheatsheet shows you exactly where you can find these five common controls.
BEAT CONNECTION CHEATSHEET GLOSSARY
- 1. DRUM SOUND
- 2. DECAY & PITCH
- 3. DRUM FILTER
- 4. DRUM VOLUME
- 5. STEP SEQUENCER
This is the section of your drum machine and/or software where you can zero in on a specific drum sound. Any notes entered in the row of this drum will place that sound in your beat. Normally, you can mute or solo that part in this section as well.
Decay and Pitch controls allow you to adjust the attack and release of a drum sound or sample. Ableton uses Fade In and Fade Out controls. They both accomplish the same purpose. Tone allows you to change the pitch of a sound. Ableton calls this control Transpose.
A Filter lets you filter out specific frequencies. In conjunction with a Resonator, you can amplify specific frequencies to accentuate certain resonances. Sounds get deep, full, or thin here.
This control lets you adjust the volume of a single drum sound, as opposed to the whole drum kit.
This is where we compose a beat. On a drum machine, this is the area is composed of buttons found in a row. You assign — via these same buttons — exactly the step you want to place the drum sound in. On a software step sequencer, your mouse and pen tool place the note exactly where it should be.






Leave a Reply