Welcome to Beat Connection, a series dedicated to promoting modern and vintage dance styles the only way we know how…by providing you a musical starting point to help you create that beat. In our previous posts, we took an in-depth look at all the tools available to help you create a beat: Simpler, Sampler, and Drum Rack. Today, we actually take the first steps of making a beat. We begin with what I’d like to dub “foundational beats.” These are standard rock, pop, funk, R&B, and dance beats that every producer should know the ins and outs of. For those about to rock…let’s begin with that beat.
Consider different fading systems
- Brian Eno, from Oblique Strategies
Just a refresher, in case you haven’t gone back to the Beat Connection archives, what we’re going to use to help you create beats is something called Grid Notation. If you don’t know what Grid Notation is, be sure to check out the first post in this series which you can find by following this link. You may be asking yourself, why start off with rock beats? It’s not just because rock is one of the most popular genres in the world, but also because rock music is also one of the world’s most straightforward musical genres, and it allows us to understand how important sequencing, or arranging drum patterns is. It’s a bit more than just a lazy 4/4 groove.
By understanding and sequencing the following three drum patterns (A, B, and C) you should be able to expand upon each by adding additional parts, removing hits, or layering other instrumental grooves over them. Straightforward and very musical, you can almost hear the sound of a roaring guitar getting ready to wail over them. As always, the A section will correspond with the main pattern which normally the verses or main melodies play over. The B section will correspond with the groove you’d normally hear playing during the chorus or pre-chorus of a song. Finally, the C section will always correspond with the break in a song. C sections are perfect for building bridges between song sections or to break up the monotony of any other sections.
If you need any refresher on what A, B, and C sections mean (and how songs are built using patterns) be sure to check out this previous Beat Connection post explaining the ins and outs of Song Structure.
ROCK RHYTHM – A
The most important idea to get across while creating rock rhythms — and more importantly the A section — is how you sequence hi-hats. Hi-Hats are a rock band’s time keeper. As much as they hate to admit it, with rock rhythms, all a drummer is doing is simply reinforcing musical time. As you can see above, open and closed hats have a specific, delineated rhythm and tempo. Every other beat is either an open hi-hat or a closed one. As long as you have that underlying beat laid down, like clockwork, all the other parts of the beat, no matter where you place them, simply serve to reinforce the meter. The main groove must always serve the other parts of the song and establish a tempo.
In the above pattern, bass drums have a dialog with snare drums, emphasizing the first beat of every fourth beat — alternating one bass drum to one snare drum, always on the one of every fourth beat. You’ll notice above, that in order to give the pattern some propulsion, a bass drum plays twice (in rhythm with the hi-hats) on the tail end of the pattern, to keep the pattern moving. If you have an old school drum machine, be sure to place the Accent notes on every drum hit that falls on the accent column. On a digital sequencer, or a DAW, you’d simply adjust up (in value) the velocity of any hit that falls within that accent column.
ROCK RHYTHM – B
Visually, notice something about the B pattern. Do you see how it’s that it’s far less busy than the A and C patterns? More skeletal in nature, this section emphasizes the underlying pulse of a song. Gone are all the open hi-hats that take up a lot of sonic spectrum. By choice, this allows other things like vocals, a compelling melodic change, or a thrilling chord change, to take up the focus of a song. Hits will appear mostly around the first beat of each 4/4 count, emphasizing that steady pulse yet again. Back-ending the more rhythmically dynamic part of the groove allows you to also introduce anticipation. Anticipation is the key to preserving interest in any listener.
ROCK RHYTHM – C
The final C section presents an opportunity to mix up the prevailing rhythm found in prior patterns. C patterns allow you to bridge quasi-monotonous sections together and to introduce spontaneity to any section of the song. This is something you can notice by listening to the groove below.
First, notice how nearly all the bottom end of the pattern drops out and is replaced with a more pronounced midrange led by a busier snare drum pattern. Then, notice the introduction of drum hits not present in other patterns. The addition of toms makes this whole section break the beats in tempo of the prior patterns and further propels the song forward. Finally, notice how the pattern ends in a bit of a flurry, trying to mimic a drum fill. These are all very human ways of arranging patterns that could languish in monotony if you stuck with the same underlying pattern through each section.
ROCK RHYTHMS – IN ACTION
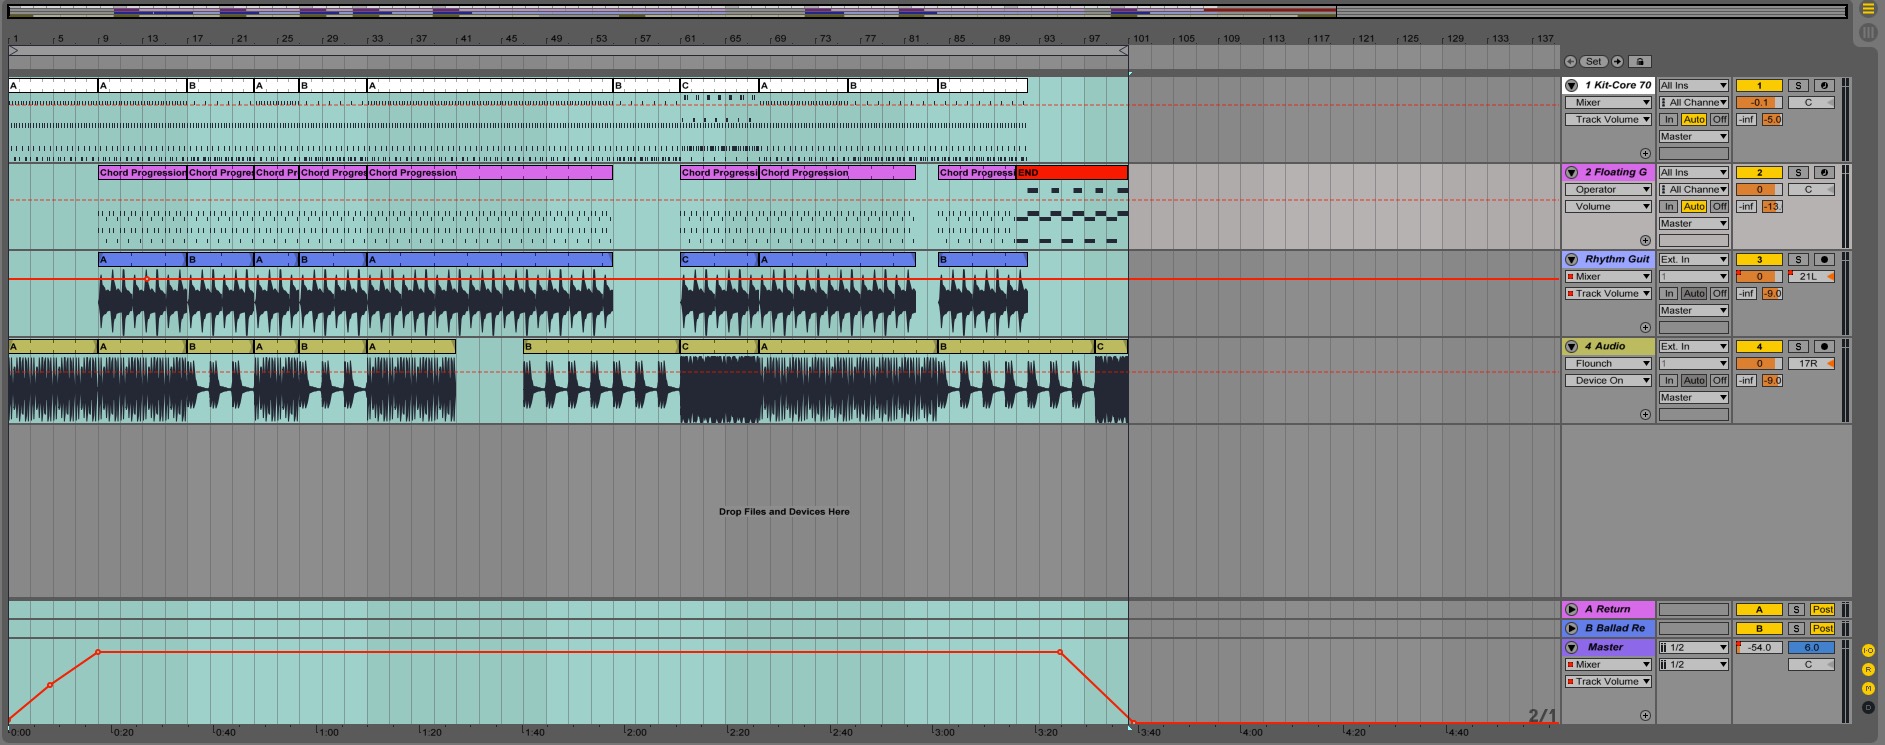
Here’s where I’ll leave you with an example of what you can do with these three sections. Using the same patterns shown above, I’ve created an Ableton Live session, which you can download below, that uses the Kit-Core 707 drum rack (available for free here) to create an actual song – one far more “dancey” than the rhythms above imply. Something so simple as adding a a synthesizer line (courtesy of Operator’s “Floating Grit Pad” preset) and two real-life guitars (one rhythm and another lead) will bring to life grooves that already look intriguing on a computer screen.
DOWNLOAD ABLETON LIVE PROJECT FILE – ROCK DRUMS
All images and sound samples by author.


Leave a Reply