Previously, we talked about fret sprout, what it is, why it happens, and how to prevent it. Sometimes though, despite how many humidifiers you’re running, it happens. Fret sprout is just an unavoidable part of owning a instrument built out of wood. One of these days you’ll go to pick up your favorite guitar (or in many cases, least favorite, as it has been neglected for a while), and you’ll get snagged by the sharp fret ends that have slowly crept off the edge of the neck as the humidity dropped.
Of all the problems that can befall a guitar, fret sprout is a small one, but it can make your guitar’s neck so uncomfortable you may not want to even play it. Thankfully, with a few simple tools and just a little bit of knowledge, you can address the issue and dress the end of your frets.
The full process of fret dressing deals with leveling out your frets, crowning them, and then polishing them down to a smooth finish; essentially reshaping the fret. This is usually done after enough string wear has occurred to cause the frets to flatten out and also divot where the strings are pressing into them. If you are just dealing with some sharp fret ends due to fret sprout, you don’t really need to fully dress your frets, so for this article, we will focus on just dressing the ends of your frets. As Billy Gibbons is rumored to have once said, “Every player’s crazy about a sharply dressed fret to deal with sharp fret edges.”
The main tools you will need are:
- fine tooth-flat file
- three-corner rounded file
- masking or painter’s tape
- varying grits of sand paper
You can pick up these files from specialty guitar tool companies such as Stewart-MacDonald, Luthiers Mercantile, and Allparts, or even your local home improvement store. For the rounded file, a single cut file is best, which is a file that only cuts in one direction. This helps to limit debris build up, but it’s not a must. Also, if it’s not done already, make sure you round and smooth out one of the corners of the file, lest you cut into the fretboard with it. I have gotten a file from a home improvement store that wasn’t specially made for guitar work that I had to do this to using a few passes under a bench grinder.
Step 1: Set Up
First off, make sure your guitar is set up how you want it and the neck is straight. Obviously if you are going to dress the frets, you want the guitar playing how you want it first. Otherwise you could end up taking too much off in one area and once you set up the guitar to your preferred action, things will be off and you can’t add back on the fret “meat” you shaved off.
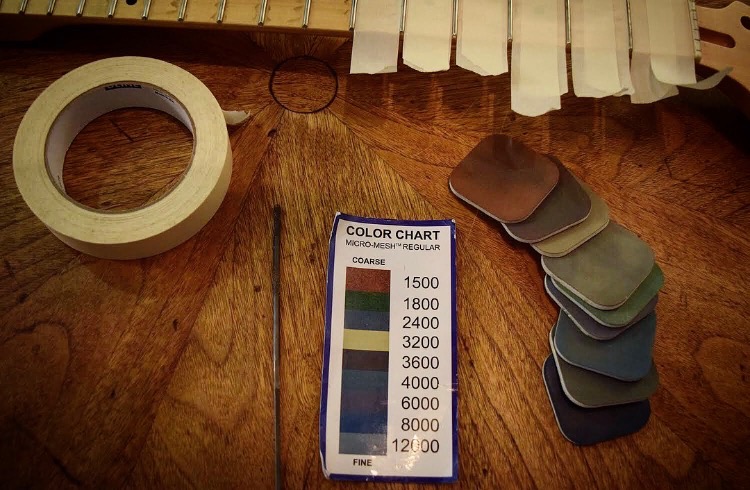
It doesn’t take much to deal with sharp fret ends
Remove your guitar’s strings and then, using the masking tape, tape off the fretboard between the frets. Run the edge of the tape right up against the fret wire. This will help protect the fretboard itself from any nicks or scratches and from having shavings dig into it.
You will also want to cover your pickups so that the magnets don’t get any metal shavings stuck to them. For this I just throw a tea towel over them, but you can also use tape.
Finally, secure the guitar itself. If you have a guitar maintenance area or table that’s a great start, but a guitar cradle works as well. If you’re reading this, you probably plan on doing some level of work on your guitar, so I recommend the Ernie Ball Maintenance kit. It doesn’t have the files you need, as those are pretty niche tools, but it has pretty much everything else needed to do general maintenance on your guitar.
I also recommend folding a towel and putting it under the body of your guitar. that will stop the guitar from sliding around on your work surface, and then that surface scratching your guitar.
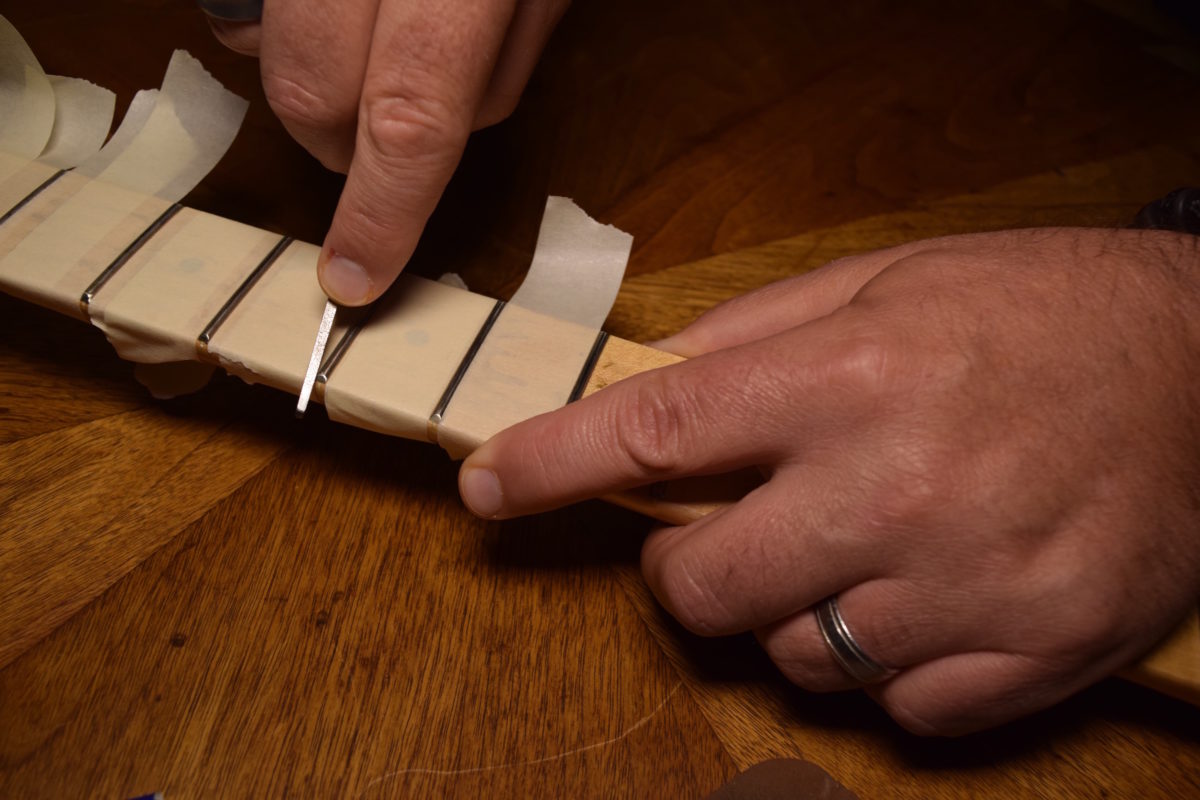
Start off with light pressure until you begin to get a feel for it
Step 2: Filing Fret Ends
Once everything is taped off, take your flat tooth file (in this case the highest grit) and hold it flat against the fretboard and gently run it down the fret from the first to the last fret. Don’t press to hard, as you may cut into the fretboard or binding if you have it, and just guide the file down, letting the tool do the work. Take a few passes at this then run your hand along the fretboard to check your progress, Your goal here isn’t to make things perfect, just to create a uniform bevel. Repeat the process on the other side of the neck.
If your frets are only sticking out slightly, this step can be skipped. In our example the fret sprout wasn’t too bad, so there wasn’t a need to take out that much extra fret material. I have definitely had some out-of-whack guitars that have needed this though.
Step 3: Rounding the Fret Ends
This next step is the part that takes a little bit of patience and finesse. This process is where you will be gently smoothing off the edges of the frets where they meet the fretboard. Take your rounded file and set the smooth, toothless edge against the fretboard and gently push out and roll the file over the fret. As with the last step, don’t apply too much pressure and let the tool do the work. Take a few gentle passes and make sure you roll the tool to sand down the corners into a smooth edge.
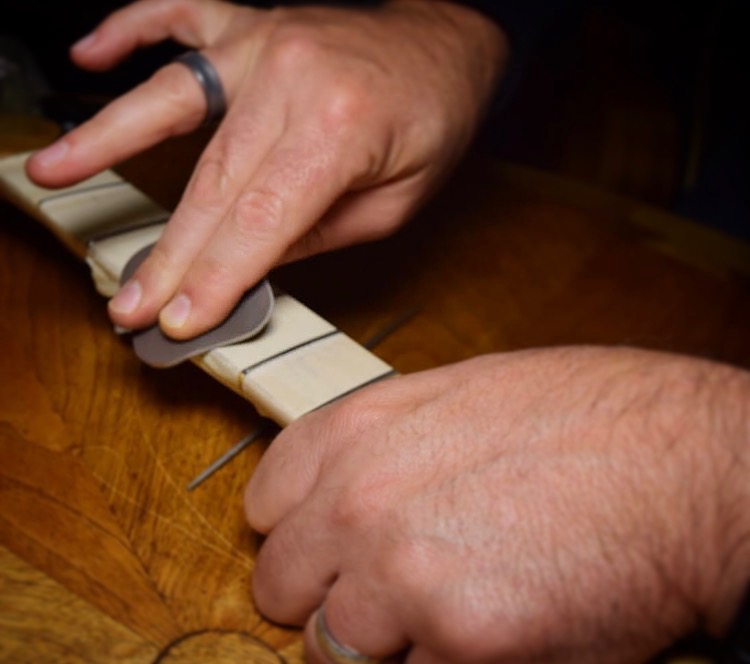
You don’t have to use the same flourish with your fingers, but it doesn’t hurt
Continue this on each side of each fret on the neck. As you get down to the higher frets and closer to the body of the guitar, take special care to note where your file is, so you don’t accidentally nick the body of your guitar. If need be, place another towel over any vulnerable areas.
When you’re done, run your hand down the neck a few times to check for any spots you may have missed. Sometimes it’s harder to see something sticking out than it is to feel it.
Step 4: Polishing the Frets
Now that you have everything rounded off and feelin’ fine it’s time to shine things up. For this step you will use the sand paper, but in my case I had a set of Micro-Mesh soft touch pads that I like to use. Running down in sequence of the pads, (or sand paper) sand down the ends of the frets, being careful not to run over too much onto the fretboard itself. Use two fingers for a little extra precision while doing this.
While not necessary, I take this opportunity to polish the entire fret, not just the fret ends. If you have older frets that are flattened down and have string divots, then a full fret dressing is needed, but in this case I just went in to give them a nice polish.
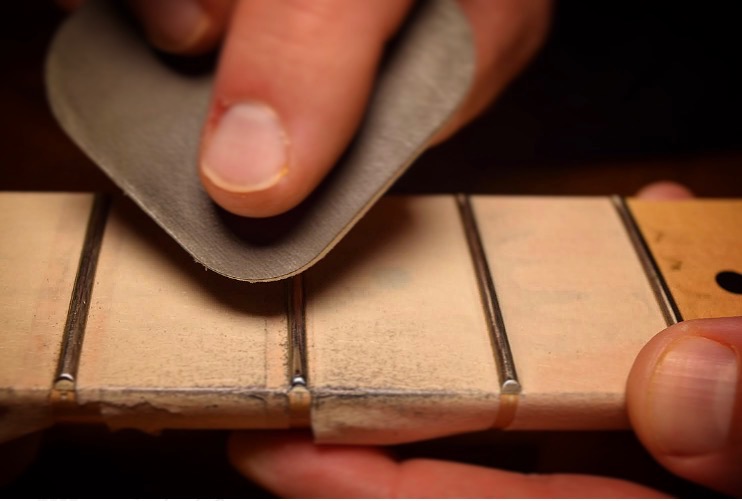
Look at the polish on that fret compared to the rest. Shiny and chrome!
Step 5: Condition the Fretboard
While you’re here, why not condition the fretboard? There are tons of products available and everyone has their favorites. I personally like to use Dunlop System 65. I usually apply it with the provided microfiber cloth, but if my neck is especially gross, I will use an old toothbrush to “scrub” it and and get off some of my finger gunk. Then, just use a soft wipe of a paper towel to whisk that dirt away!
And there you have it, using a few simple tools, a little bit of elbow grease and around 20 – 30 minutes, you can smooth out those gnarly sharp frets and get your guitar back to playing condition again. Sure, you can just take your guitar to your favorite shop and have a luthier do the work, but there’s no sense of pride and accomplishment in that. Apply your DIY ethos not just to the basement shows you play, but to the guitar you play at those shows!



Leave a Reply