When most musicians think of miking a drum set, they often picture four microphones right off the bat. One for the snare, kick and a pair of overheads — beautiful simplicity. But where do your overheads go? Where do you mic the snare, or the kick? Today in the studio we’re down to 4 inputs on the interface, and we’ve got to track a great drum sound that will honor the song.
How are we going to do it? By pulling techniques from the past 50 or so years of recording history, we’ll have a great-sounding drum track in no time!

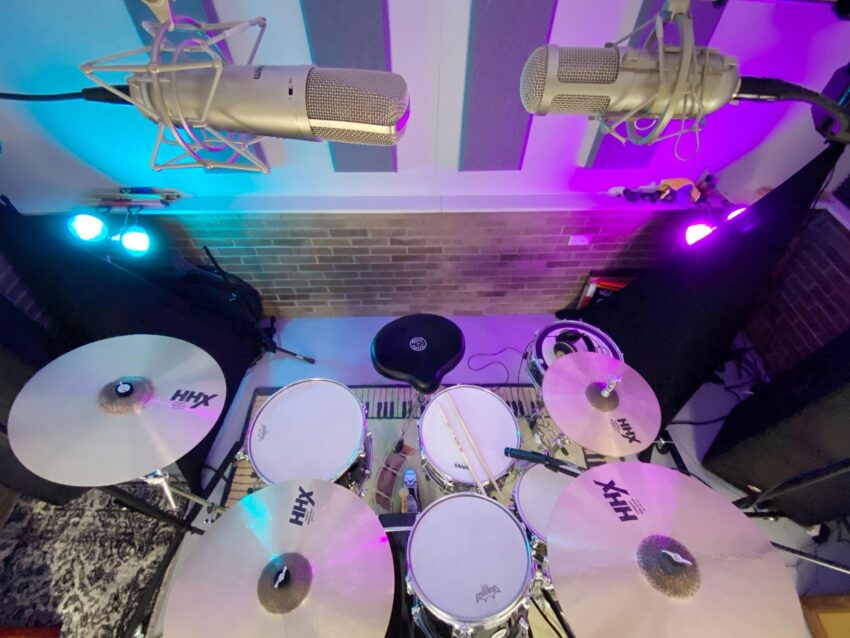
Miking Technique 1: Stereo Pair
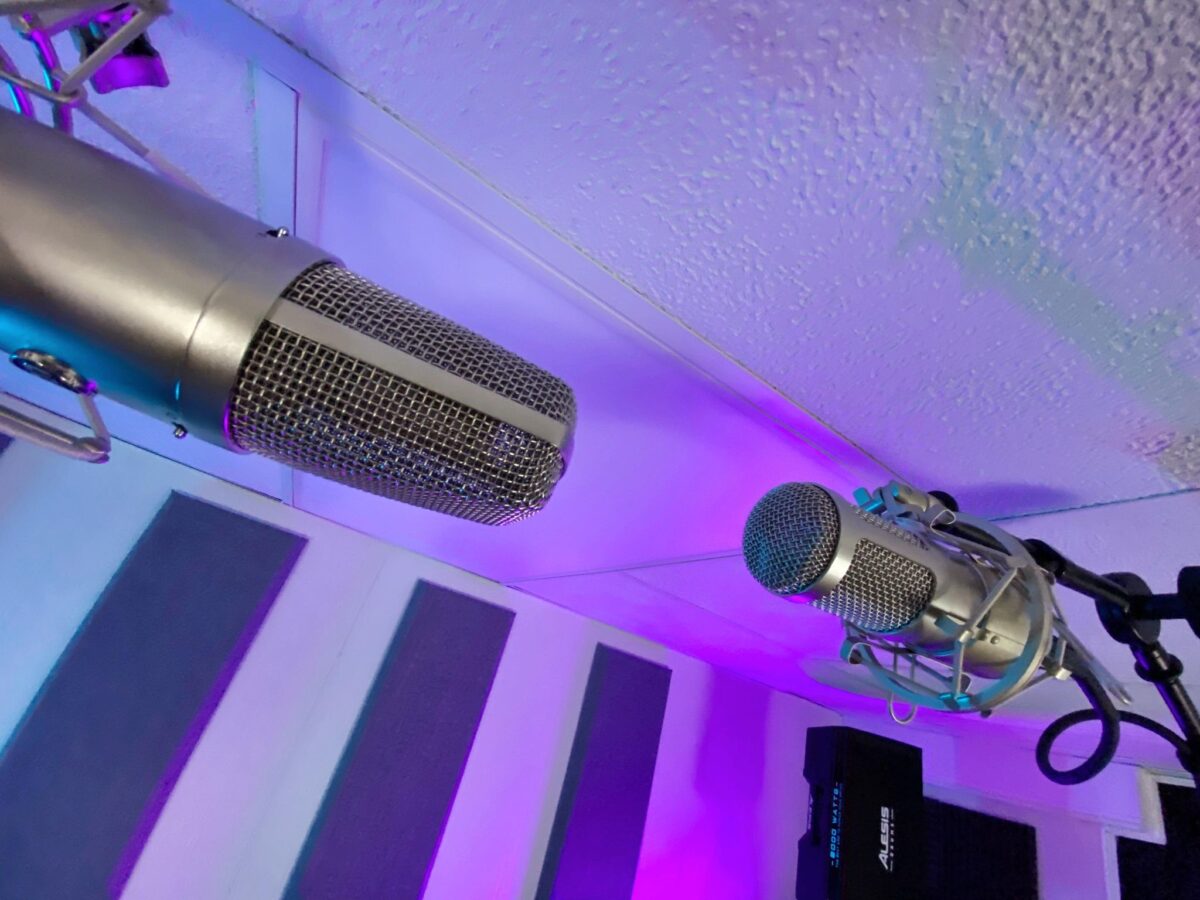
The way to think about the stereo overhead pair technique is visualizing the drum kit split in half. If you had to hard-pan a kit, what would you want in the left ear and what would you want in the right ear? The stereo pair technique allows you to align your mics to capture what’s most important for the track. That could be heavy toms, cymbals, or an even balance. It can be made as simple or as complex as you’d like, and you’ll get bonus points for experimentation!
This technique is all about keeping your pair of overhead mics in phase. There are a million ways to do this — the easiest is using a tape measure (keep one close to the kit if you record a lot) or a random XLR, instrument or speaker cable you have laying around. Measure your length of tape or cable from the center of the snare drum batter head to the capsule of the left microphone, then do the same for the right. When these are an equal distance you’ll most likely be totally in phase and no cancellation should occur. But why are we measuring from the snare? Typically, the drummer’s snare drum is the loudest, harshest piece of sound coming off the kit while playing. Sure, there may be instances where this isn’t true, but for 99% of applications you should measure from this point. Of course, it’s always fun to experiment and see what phase can do for you!

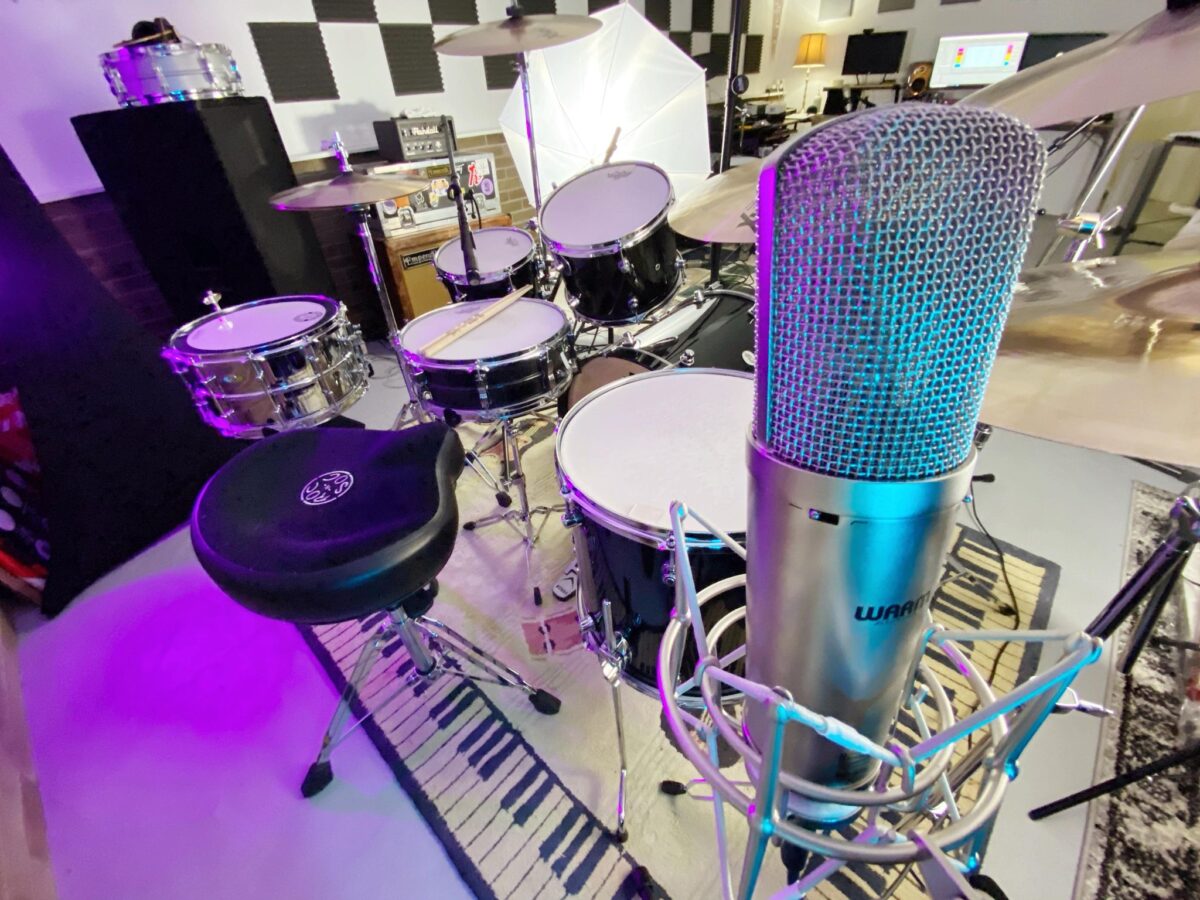
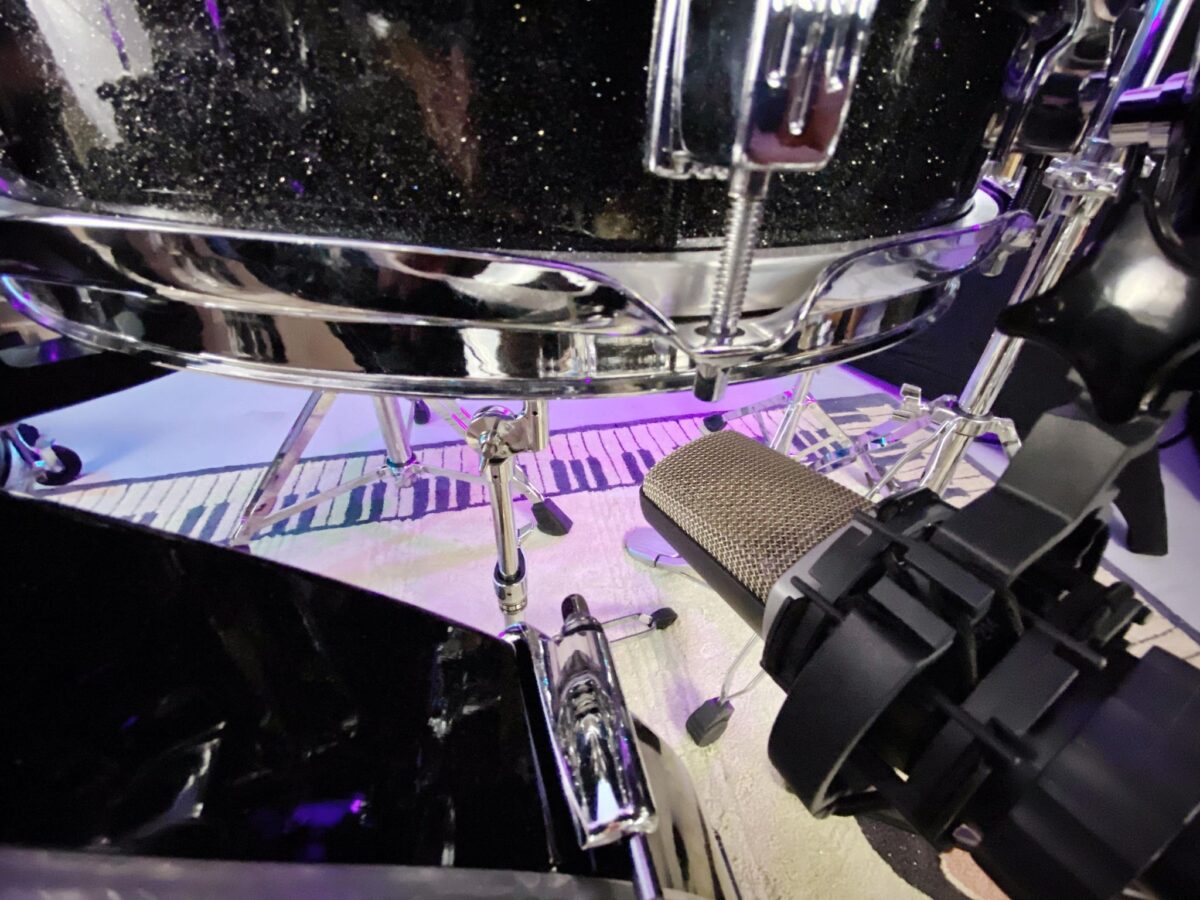
Now that your overheads are in phase, it’s time to mic up the snare and bass drum. For the included tracks on this post we’ve used an AKG C214 condenser microphone with -20db pad on the resonant snare side. We’re doing this today because of the distance between overheads and snare (We don’t have 20+ ft ceilings in the home studio) and that we’re recording a Ludwig Supralite steel snare drum that happens to be 8″ deep. So the overheads pick up a ton of the batter-side tone (that honestly records a lot like a tom drum) and the resonant microphone gets all that crispy snare action down below.
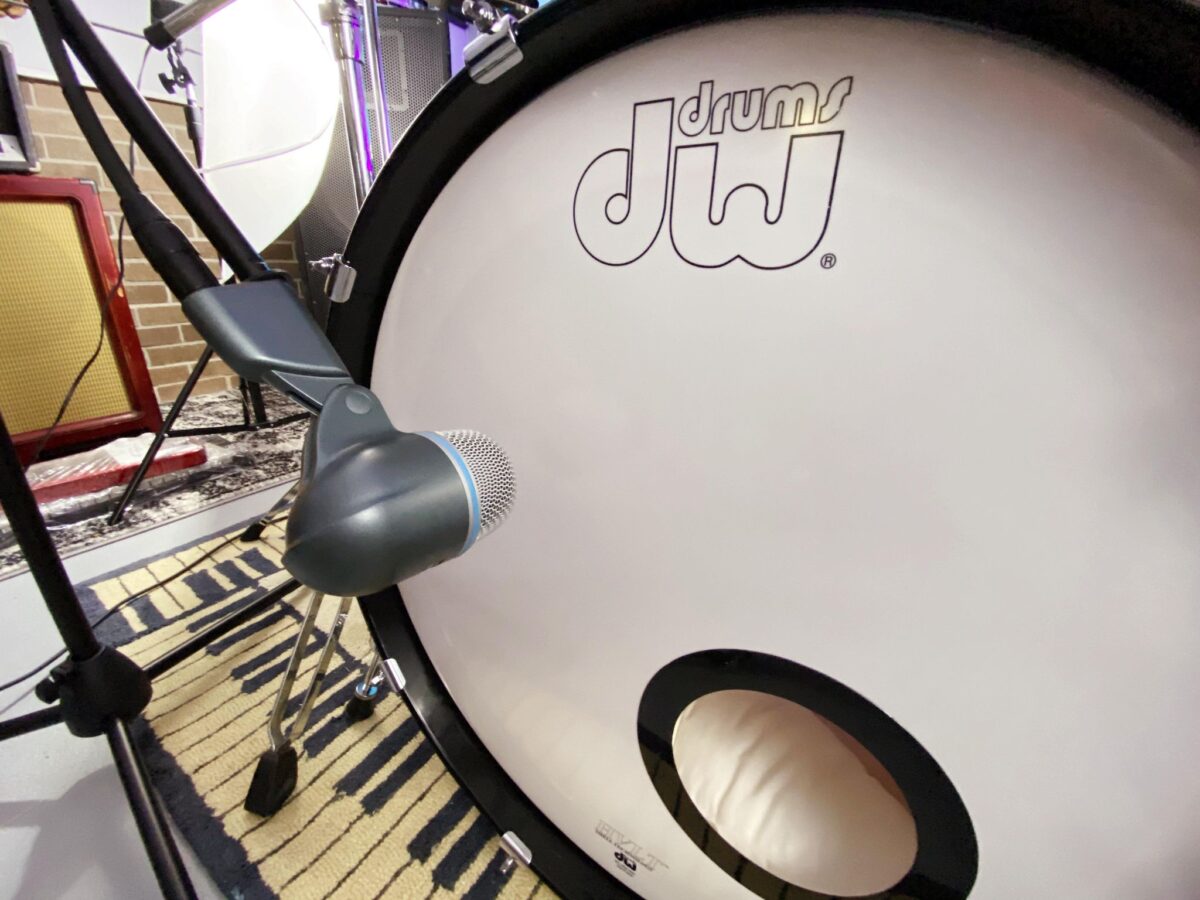
The bass drum is simple, but once again you get bonus points for experimentation! Today in studio we’re placing the tried-and-true Shure Beta 52A dynamic kick drum microphone 3-5 inches from the resonant head on the bass drum. Feel free to mic inside your kick if you have a port hole cut, or using a sub-kick microphone might be cool. The end goal is for it to sound good to you, so whatever kick frequencies you like, capture those!
Miking Technique 2: Modified “Recorderman” with a Bit of Glyn?
A variation (or maybe bastardization) of the Glyn Johns method can achieve amazing drum tones on a recording. Just because we’ve rolled two techniques into one doesn’t mean you can’t get the fantastic benefits from these decades-old techniques! Where the Glyn Johns technique would use dual ribbon microphones as overheads for a warm sound, today we’ve got dual condenser microphones. We’re using an MXL 910 condenser and a Warm Audio WA-87 respectively. And where the Glyn Johns technique only uses one additional microphone on the kick drum today we’re using both a bass drum microphone and a snare microphone on the resonant head to capture the snares. For more info on a true Glyn Johns recording technique check out the post linked below
Related: The Glyn Johns Drum Mic Method… and Beyond!
We will walk you through the more traditional Glyn Johns method first, eventually adding some mics, and then walking you through our mixing process. | Read »
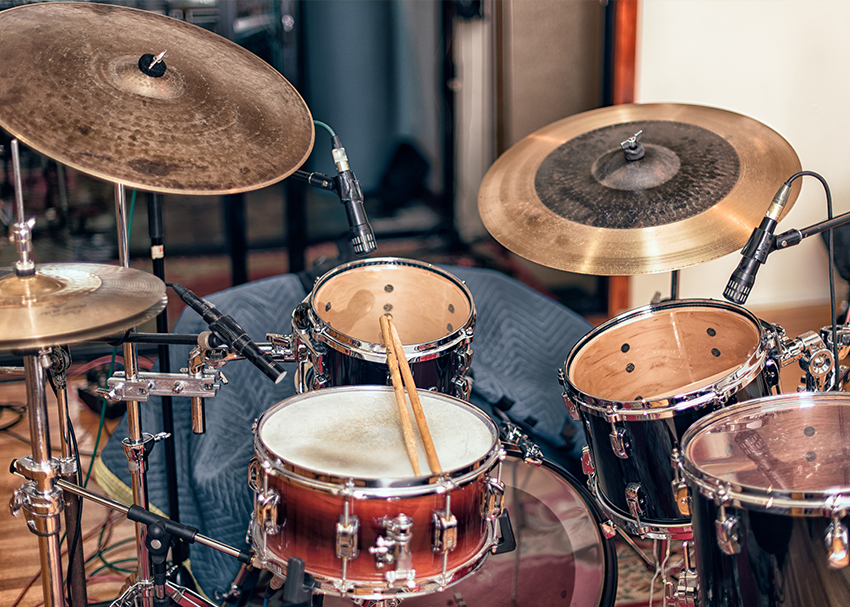
That’s why we’ve mentioned the “Recorderman” technique, as depending on how much room you’ve got around the kit, where the mic is place and how high its sitting will heavily impact what is captured. In both the Glyn Johns and “Recorderman” overhead techniques they prioritize what the drummer hears. The drummer isn’t hearing the resonant heads reverberate sound; they are hearing the batter head’s attack, and the resonant warmth around it. That’s why these techniques are so widely used — their results truly make you feel like you’re behind the kit as the listener.
In setting up for this technique you’ll be using a stereo pair of condensers, (or ribbon mics if you’re lucky!) with one positioned directly over the snare drum with the capsule facing down towards the kit. Mic height can range, but go as high as you can if you’re in a smaller room, and if you have unlimited ceiling height shoot for at least slightly above the drummer’s head. The other overhead should be placed off to the side of the kit. We went with a lower microphone height facing into the kit at the snare (à la the Glyn Johns method.) But this also works if the mic is placed higher with a capsule even with the drummer’s ear. This can also be referred to as “over the shoulder.” Like we mentioned before, the goal is to hear what the drummer hears, and they hear with their ears so why not put a mic there?
The rest of the method (snare and kick miking) is the same as the stereo pair method; we’re miking the resonant snare side of a Ludwig Acrolite with a condenser mic, and the bass drum with a dynamic microphone built to capture lower frequencies. This method is great for those deep tom grooves and heavy rock drummers, but also dynamic jazz or swing performances.
There’s not one miking panacea; the beauty of drums is that each kit is totally different, each drummer is totally different and each room is totally different. But that’s why it’s so much fun to experiment, so discover what works for you and your space.


Leave a Reply