If you’re someone who pinches every penny like me, or just someone who wants to wear other people’s used clothes, the thrift store is a great place to frequent when you’re in the buying mood. But short of an old church organ too big for your sub-compact car, there aren’t ever that many musical instruments to be found in your local Goodwill. This all changed when I happened upon a 14″ First Act poplar snare on one of my visits. For $9 I had a full-size, poplar wood snare in a dark ruby red wrap! The heads were worn, snares rusty and hoops oxidized, but it was $9 and I couldn’t resist.
So with this new purchase, a project idea arose: bring this cheap and broken snare back to its former glory, and then some! This guide not only catalogs my restoration process on the $9 thrift store snare, but acts as a template for when you inevitably find that “diamond in the rough” snare or just want to spruce up an old drum with some new components and a little elbow grease.
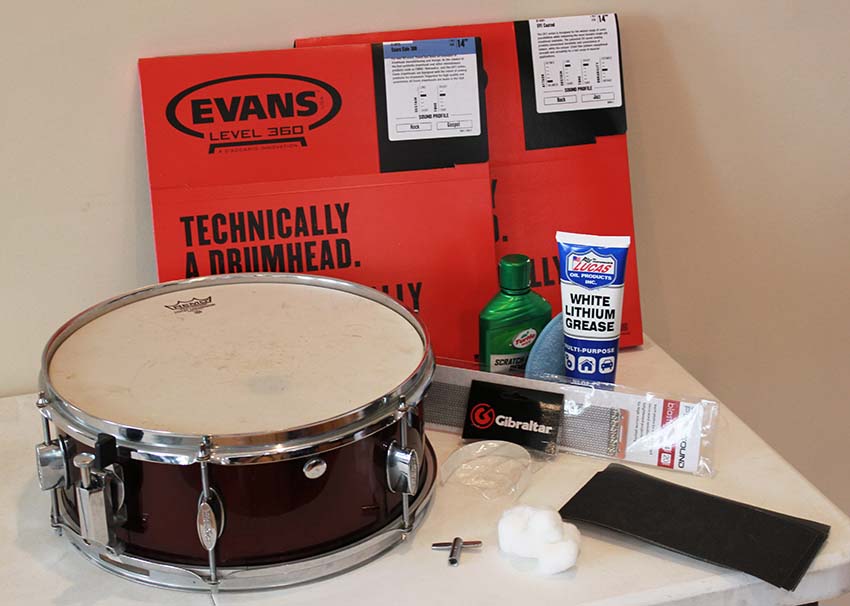
All the components and supplies used on the Thrift Store Snare build!
Problem Area Diagnostic & Deconstruction
First, diagnosing the major problem areas your old drum might have is incredibly important. This gives you an idea of not only how hard or time-consuming your repairs will be, but what parts and supplies you will need. The thrift store snare I was dealing with had a ton of oxidation on the hardware, a strange reverberation when hit, and rust on the hoops and snare wire.
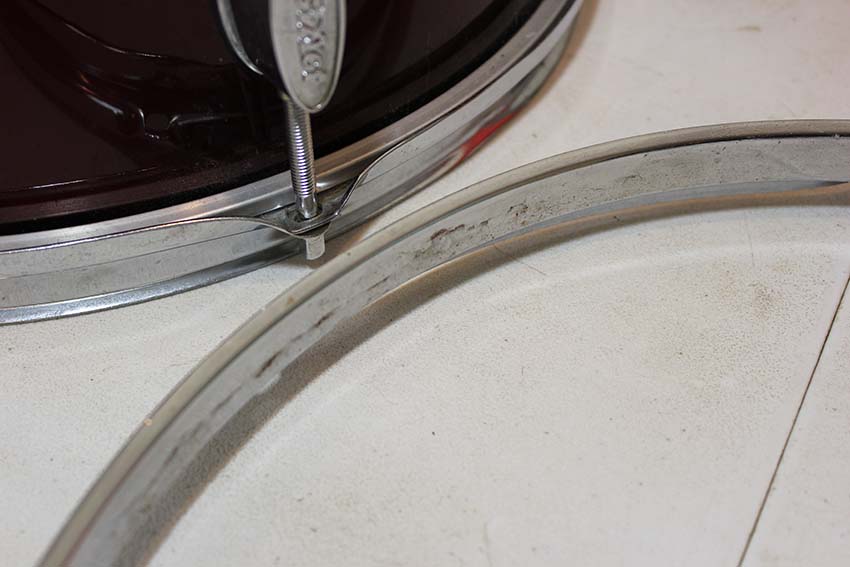
The rust and discoloration on the interior of the hoops.
A lot can be assessed when the drum is together, notably its tone and how it looks cosmetically. But the real story becomes clear once the entire drum is taken apart. I took the snare down to just its shell to see where we could start. There was some noticeable wear on the bearing edge and around the snare beds that was most likely the culprit of that horrible reverberation that made each snare hit sound like an out-of-phase monstrosity. I was able to correct this with some sanding, but I strongly advise against sanding your own bearing edge if you haven’t done it before. Seek the guidance of a professional, or better yet, pay them to do it for you. The bearing edge is the tone center of the drum; this is where drum wood meets the head and gives you your resonance and tone. It is extremely important that you heed this warning before messing up a nice drum. Go buy a $9 thrift store snare and practice on it instead.
Maintenance & Polishing
Once everything was taken apart and assessed, the project finally came into view. I started by cleaning the drum shell of debris — this can be done with a microfiber cloth or something similar that won’t scratch. If smudges or debris won’t come off, a small amount of soapy water can help speed up the process of removal without using much more force. As for the shell interior, unless your internal shell is lacquer-coated do not use water on it, just continue to use a soft cloth to remove any debris or smudges from the inside.
I went ahead and cleaned each lug off with a bit of degreasing cleaner and a soft cloth, then used a Q-tip swab mounted to a drill with a tiny bit of polish and inserted them into the tension rod mounts of the lugs to clean them out faster and more throughly. You can also mount the ends of your tension rods onto a power drill. Then put a cloth with polish around the rods and hold while the drill spins. This gets the cloth fibers and polish into each thread of the rod and cleans it completely in no time flat!
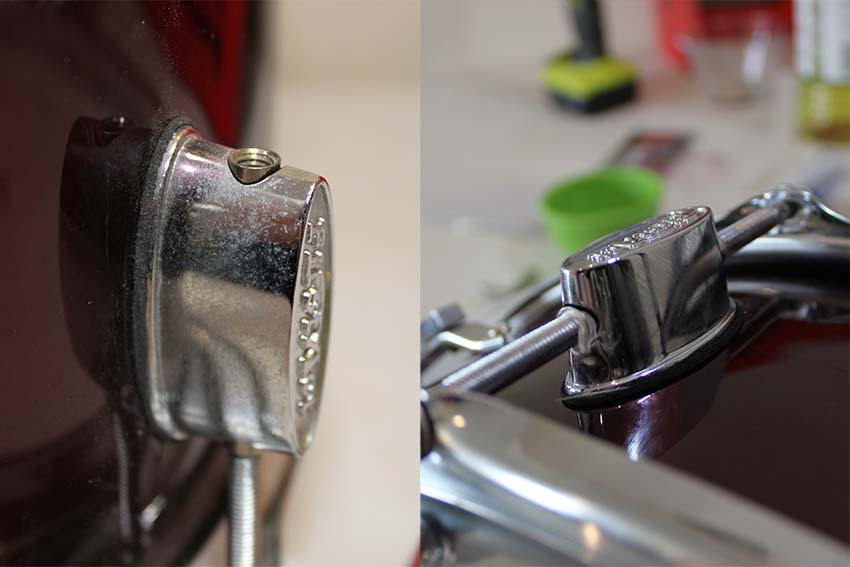
Before (left) and after (right) cleaning and polishing the oxidized lugs.
Now that each component had been cleaned of oxidation and debris, I went over all of it with an automotive polish I had on hand. A standard drum or cymbal polish could also work, but something a little more heavy duty was needed in this case and the automotive polish brought out the shine of the chrome and got rid of the many imperfections this drum was showing beforehand.
After the drum was polished up and looking good, I added a bit of white lithium grease to each tension rod before threading them back into each lug. This is a mid-temperature lubricant that works really well on drums. It allows each tension rod to move easily when tuning and prevents future “lock up” or rusting from moisture.
Reconstruction & Sound Testing
Now that we’ve addressed each component of the snare that we are keeping, we can reconstruct the drum with some supplemental hardware! After ensuring that each lug is on tightly with washers, the throw-off and butt plate mounted and muffler back in place, we can add our new heads to the batter and resonant sides. Then with the placement of both shiny-new chrome hoops and tension rods, the reassembly is almost complete. I decided to go with an Evans UV1 coated for the batter head and an Evans Hazy 300 for my snare side. I then added some new Gibraltar nylon snare strips and of course, brand-new Puresound Blasters snare wire in the 20 strand configuration.
From the new heads to the snare wire and even strips, the thrift store snare is now looking factory new, and has a new sound that is leaps and bounds greater than when I found it. It sounds fat behind the kit for a 5.5″x14″ shell, and even though it still leaves a bit to be desired on the “snap” end of the tone and it doesn’t tune up as well as it would without edge damage, the snare is a gig-able option in it’s current state.
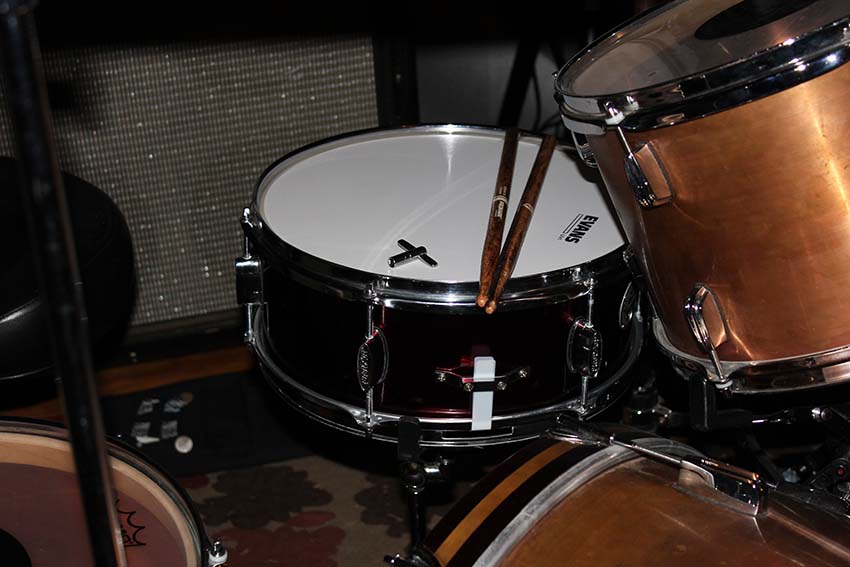
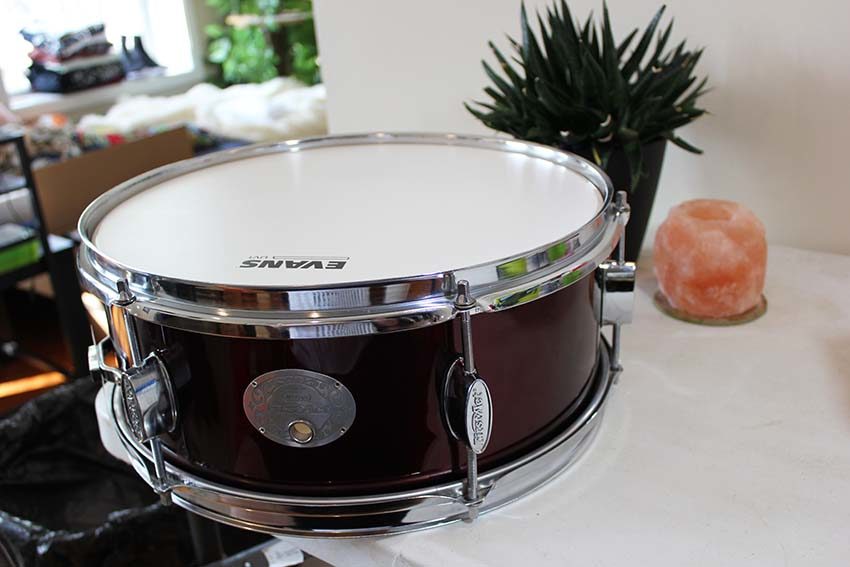
The completed snare drum sitting behind the kit!


Leave a Reply