Great recordings are defined by their drum sound. Think about your favorite album — can you picture that snare timbre in your head? Arctic Monkeys’ AM is a perfect example of a drum sound that truly defined an album. Tchad Blake took a high-energy group of performers and matched the mix to their personalities. I’ll admit it, I love it when a drum kit sounds larger than life like this, so let’s explore some techniques you can use to add subtle power to a drum mix.
Hip-hop’s influence has bled its way into multiple genres. Young artists want a kick drum that can hit as hard as the sampled drums on their favorite hip-hop records. As engineers, we need our drums to slap without sacrificing the original sound of the acoustic drum kit. I like to layer a kick drum sample in with my acoustic kick to add some extra personality to it. Logic X has the “Replace or Double Drums” function, which generates MIDI notes at every transient in the recording. After you’ve got the MIDI information right, you can use any drum sampler to select and alter your drum sample. I used Native Instruments’ Battery. I have provided a recording of the drums without the kick sample below:
This recording has the bass drum sample added to it. The difference is very subtle, but you will notice that the kick now has more sustain to it. The added sustain makes the kick feel slightly larger without sacrificing the attack of the acoustic kick.
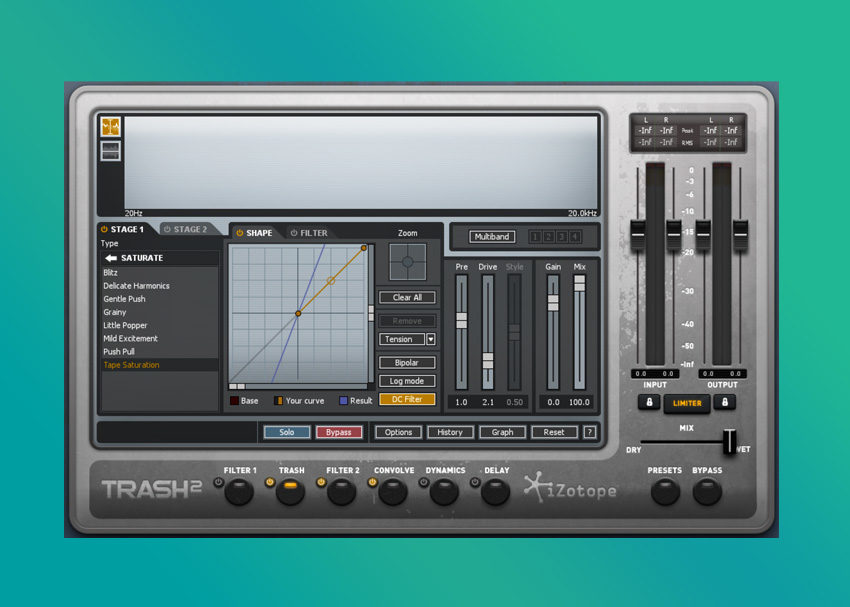
The tasteful use of saturation is another great way to beef up your drums. I recommend sending the output of all of your drum tracks to one stereo drum bus. Then, add some saturation to that drum bus. I actually used two plugins to saturate my drum bus. iZotope’s Trash 2 has some of my favorite options for saturation, under the “trash” module of the plugin. The trash module features two stages of saturation. At stage 1, I chose the “Tape Saturation” algorithm. With the mix at 100, I brought the drive up until it was just barely distorting the signal and then I pulled the mix back to 40. For the second stage of saturation, I chose the “Mild Excitement” algorithm. The first stage of tape saturation added some punch in the low-mid frequencies and the mild excitement saturation added some clarity to the cymbals.
I was subtle with the saturation on this but I highly recommend using a heavier hand if you want to achieve a grittier sound. The recording below features the trash saturation that I just discussed. If you compare if to the previous recording, you will notice that the snare drum has a bit more bite to it. (You can get iZotope’s Trash 2 with the purchase of the iZotope Creative Suite.)
For the last stage of drum bus saturation, I added Softube’s Saturation Knob. Most of my colleagues will confirm that I am OBSESSED with this plugin. The Saturation Knob has three different saturation types: Keep High, Neutral, and Keep Low. Basically, Keep High adds some crispy high-frequency sizzle, Neutral gives you a chunkier set of mid frequencies, and Keep Low will beef up your low frequencies. I used the neutral saturation with the knob sitting around 9 o’clock. I chose neutral because I was still looking for more punch in the mid frequencies.
Be careful when you’re using the saturation knob because it adds volume to the track. Their focusing equalizer has the same saturation, but it also has a volume knob. I recommend adjusting the output because the added volume can trick your brain into thinking that it’s just better without observing the tonal changes. The recording below features all of the saturation that I have discussed. The saturation knob’s effect is most apparent in the kick drum, which now has some added umph to the mid-range attack.
For this song, I chose not to distort the drums too much because it didn’t fit the song. If your recordings require an even larger drum sound, I recommend adding even more drive to your drum bus. If you’d like to hear these drums in context, I have provided a link to the full song below.


Leave a Reply