
Whether you’ve blown a speaker, are filling up an empty vintage cab, or are just searching for that elusive “perfect tone,” replacing a speaker in a guitar or bass cabinet is not nearly as daunting of a task as it may seem. A few simple tools and supplies can get even the least-handy of players switching out speakers in a matter of minutes.
We’ll start with the basics. To effectively replace a speaker in a guitar or bass cab, you’ll want the following:
-

- Wire Stripper / Cutter / Crimper Tool
-
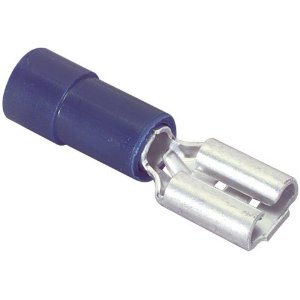
- Female .205″ Quick-Disconnect Terminals
-

- 14-Gauge Copper Speaker Wire
-
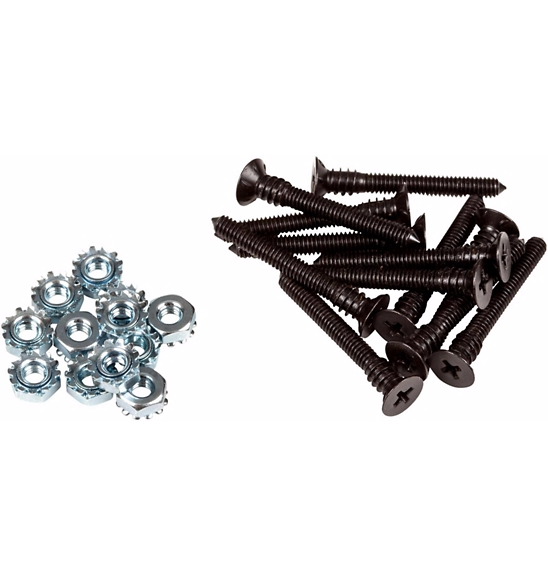
- Speaker Mounting T-Nuts
Having the above supplies will make the job quick and painless, as you will be able to avoid the use of a soldering iron. Now, onto the job itself. We’ll approach this as if you’re going to be wiring up a completely empty 4×12 speaker cabinet to have an 8Ω rating.
Step 1: Remove back of cabinet
Once you’ve gotten your tools and supplies together and have chosen the cab, go ahead and lay it grille cloth-side down on a level surface (ie the floor). Most cabs with a closed-back design will have a wooden panel screwed onto the back, so you’ll need to remove that to get the cab opened up. Feel free to arrange the speakers in whatever position you prefer, (most cabs will have circular openings in the baffle where the speakers sit just right) then attach them to the baffle using the t-nuts and existing mounting holes.
Step 2: Cut, strip and crimp wires
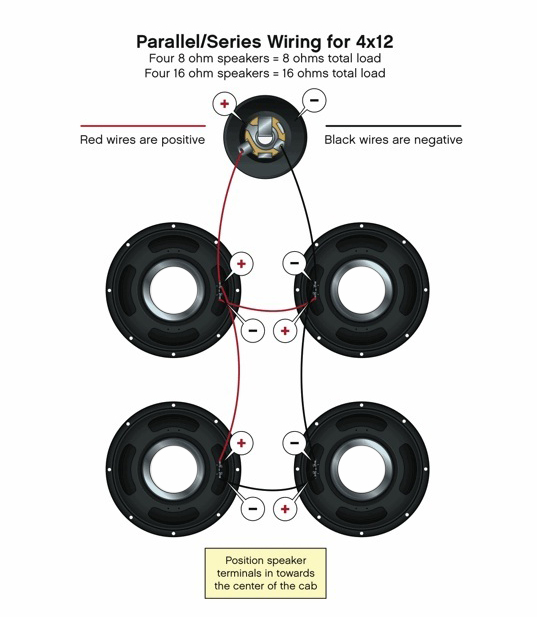 Once you have your speakers arranged and mounted in the cab, it will be time to prepare your speaker wire. I like to roughly measure out the lengths of speaker wire I will need to wire a cab, then cut and prepare it all at once before I begin connecting any wires. You can get an idea of the lengths you’ll need by taking a look at the included wiring diagram. Once you’ve determined how long each wire should be, you can start cutting. Measure out a length of wire and use the cutting portion of your stripper/cutter/crimper tool to cut what you need. Then, using the appropriate gauge section of the tool, strip off about 1/4″ of shielding from each end of the wire. Once you’ve stripped each end, bare, frayed copper wire will be exposed. Take your finger tips and twist the frayed wire together, then slide it into the end of a quick-disconnect terminal. After doing that with each end of the wire, place the crimper portion of your tool around the end of the terminal and squeeze to crimp the terminal to the wire. Repeat this with each length of wire (for a series/parallel connection, you should have 6 completed wires by the time you’re finished).
Step 3: Connect wires to poles
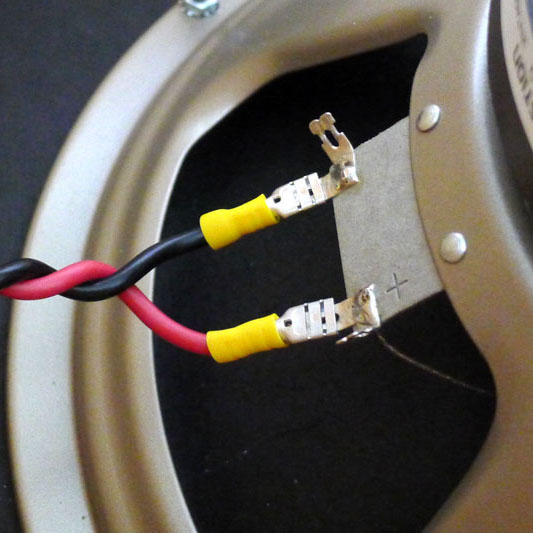
Speaker Terminal Connection
Now that all your wires are prepared, you can start attaching them to your speakers, following the pattern indicated in the wiring diagram. To attach the wire to each speaker, locate the poles (aka lugs, there will be two “+” and two “-” lugs on each speaker) and slide the quick-disconnect terminal over the pole. If you’re using the .205″ sized terminals, the fit should be pretty snug, however, if you’re using larger terminals, you may want to crimp the terminal to the pole for a tight fit. Keep doing this for each speaker until you’ve wired them all in the pattern shown in the diagram. Once all the speakers have been wired, you’ll be ready to finish the job by wiring the speakers to the cabinet’s input jack. This will be done in essentially the same way, by sliding the terminals over their respective speaker poles, and their respective “+” and “-” poles on the input jack.
Step 4: Test your connections
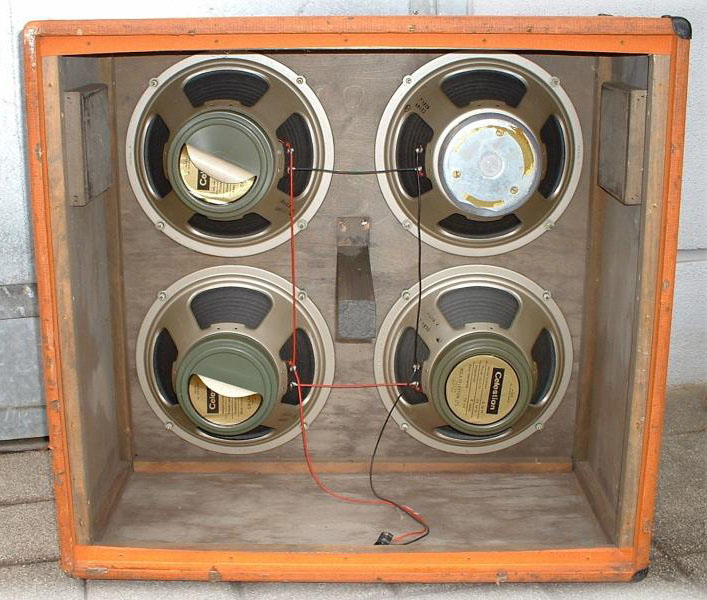
A wired cab with backplate left off
After you’ve connected all the wires to their proper locations and have ensured that everything is nice and tight, it’ll be time to test things out. Go ahead and plug your amp head of choice into the input (make sure you are matching ohm ratings) and turn it on. If you’re using a tube amp, wait for it to warm up, then take it off standby and play through it at a low volume. Listen to each speaker individually to make sure they’re all producing sound, also listen for interruptions or crackling in the sound which could be signs of a bad connection somewhere inside the cab. If everything checks out, you can screw the back panel back onto the cabinet, pat yourself on the back and enjoy your new (and hopefully improved) tone.


Leave a Reply