
Although the 1980s have come and gone, the impact the decade left on studio techniques (and snare sounds) still lives on today. Yes, some studio tricks from that era can be quite over-the-top, but if you’ve never indulged yourself in how they’re done, you might be missing out on a broad palette of sounds. In this edition of Studio Solutions, we’re going to take a quick look into the big ’80s snare drum sound.
Click any of the screenshots in this post for a closer look at the settings!
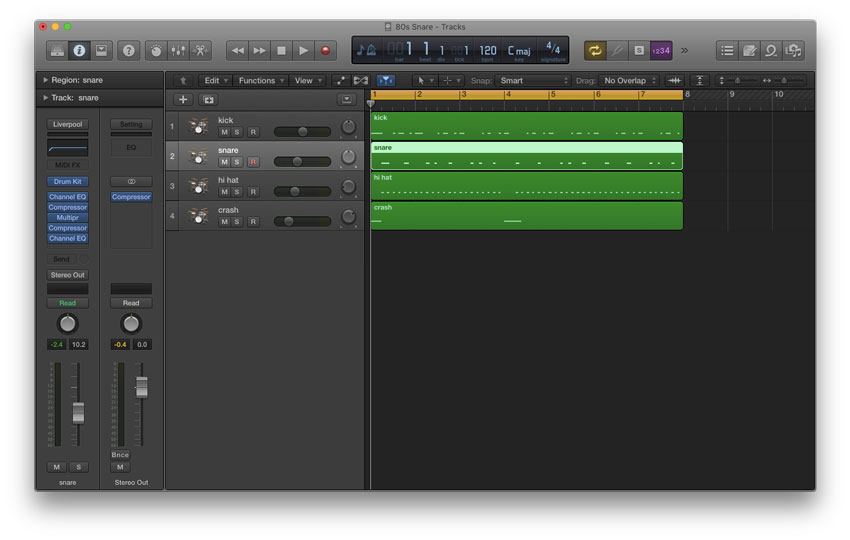
Simple MIDI drums session setup.
Here’s the basic ’80s snare sound we’ll be working with:
Although the straightforward, raw result might be a little too cheesy to use on rock recordings these days, experimenting with modulation or distortion can yield some fun results. Using Logic X Pro, I’m going to walk you through the steps to create this sound, as well as go through a few experimental ways you can push boundaries with this old-school trick.
Setting up the Technique
For this session, I quickly laid down a MIDI drum beat. Of course, this trick will absolutely work with acoustically recorded drums too.
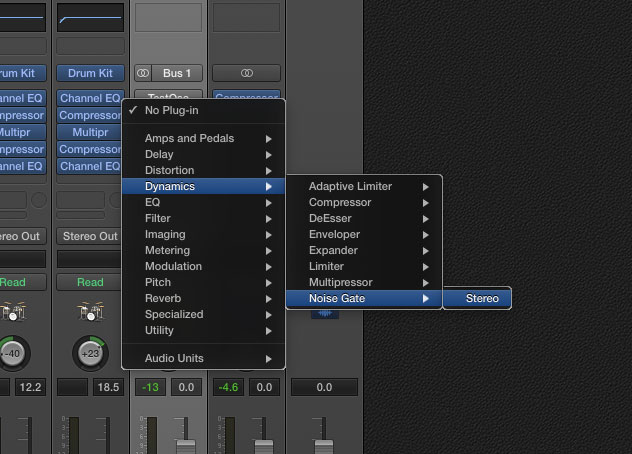
After you have your drums recorded, you’ll first need to select your snare track. In snare’s channel strip on the left, select send, and send it to an available bus. (Bus 1 in this example.) Logic should then open up a new aux channel for you automatically.
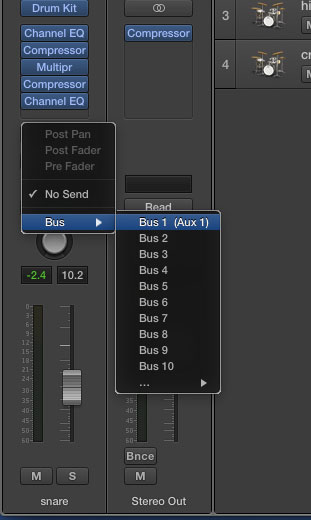
Choose a bus to send your snare signal.
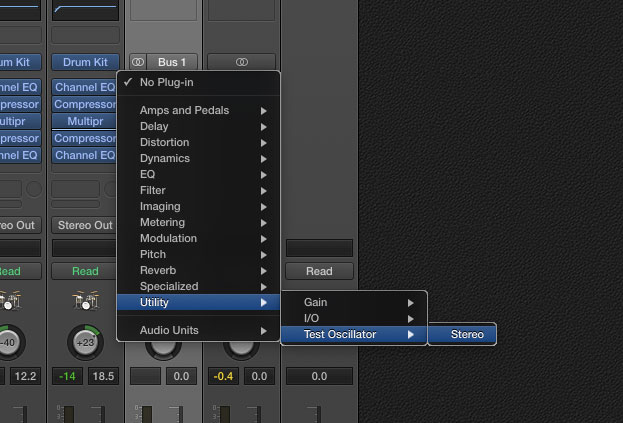
Select a noise generator like the Test Oscillator plugin.
Now, open your mix window and turn your attention to the aux channel that was just created. In the Audio FX (plugin) section, you’ll first want to open up the Test Oscillator. This plugin generates test signals like sine waves and white/pink noise for calibration purposes. We can, however, use the noise generator as an effect, like we’re going to do now. I chose pink noise for this example, but feel free to use white noise if preferred.
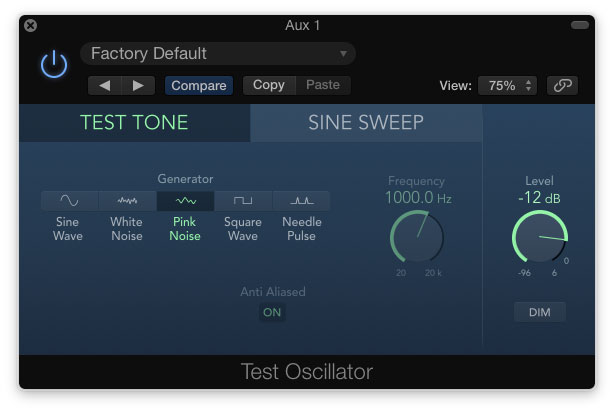
Use pink noise for a warmer sound.
After creating the Test Oscillator, the next plugin in the aux channel’s signal path should be a noise gate. This plugin keeps the pink noise silent until we want to hear it. On the gate, there is a drop down menu labeled “Side Chain.” Open this up and select the same bus your snare track is feeding. (Bus 1 in this example.) By doing this, you are essentially letting the gate know to only open up when a snare drum signal comes through.
Choose a noise gate so the pink noise isn’t on all the time, only when you want it.
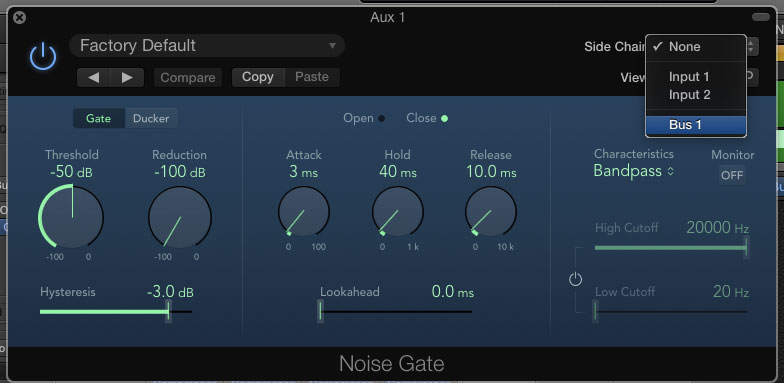
The snare bus send will trigger the gate to only open the gate when the snare hits.
Mixing
The next part is where the art of mixing comes into action. Hit play on your session, and listen to the drums as you mess around with the aux channel’s noise gate settings. Bring up the threshold until the pink noise only pokes through when the snare hits. If the noise is on all the time, raise the threshold. On the other hand, if you can’t hear it at all, lower the threshold until you can.
Next, I slowed down the attack a little bit so the noise pokes through the gate just a few milliseconds after the initial snare hit. I feel like this produces some depth and space to the effect. To dial in the hold and release settings, listen to the groove of your session. I like to set the noise to release slowly so it breathes with the music. Essentially, I’ll set the release so the signal dies out just a hair before the next snare hit.
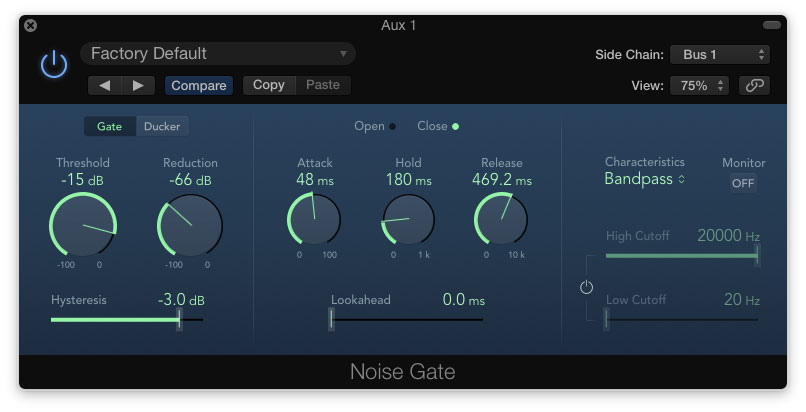
Set your gate just right to get the perfect sound.
Using the aux channel’s fader, mix the noise’s volume so it sits just under the snare. You don’t want the decay to be the focal point (unless that’s what you’re going for), but you also want to be able to hear it. And there you have it: the big 80s snare drum sound in just a few simple steps.
Big ’80s snare with noise:
Experiment!
Experimenting with this technique to create new sounds is really easy to do once you get the hang of setting up the initial effect.

